jQuery can animate div layer easily thus allow create interesting web page effect. In this jQuery animate div layer tutorial series, we will animate the div layer in four direction, i.e. down, up, right and left direction.
Table of Contents
jQuery Animate Div Layer Down
The first tutorial shows how to animate the div layer down.
jQuery Demo
A demo of this jQuery tutorial is available. Click here to View Demo (Pop up window)
Goal of Animating Div Layer Down
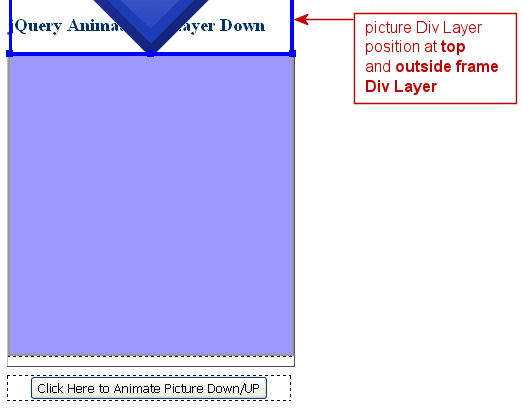
The following diagram is the starting layout of the Div Layers. The picture Div Layer is simply position and hidden at the top position. When the “Click Here to Animate Picture Down/Up” button is clicked, the picture div layer will animate down.
HTML Layout of Div Layers
This is the HTML code of the picture Div Layer:
<div id="frame">
<div id="picture"></div>
</div>
This is the styles of the picture Div Layer:
#picture {
position: absolute;
height: 298px;
width: 282px;
background-image: url(arrow_down.png);
background-repeat: no-repeat;
top: -298px;
}
And the styles of the frame Div Layer is:
#frame {
position: relative;
height: 298px;
width: 282px;
background-color: #99F;
border: 2px solid #999;
overflow: hidden;
margin-bottom: 10px;
}
Animate Div Layer Down and Back
The first thing to do is to get the outer height of the picture div layer. And then position the picture div layer at the top just above the frame layer when the page loads. The jQuery codes are:
// Get the outer height of #picture Div
var heightShift = $("#picture").outerHeight();

// Set starting position of #picture Div
$("#picture").css( { top: -heightShift + 'px'} );
There are two scenarios when animating the picture Div Layer.
Case 1: Animate the Div Layer Down
It simply animate the picture div layer down, creating an effect that the arrow image is dropping down from above. The jQuery codes is:
$("#picture").animate({ "top": "+=" + heightShift + "px" });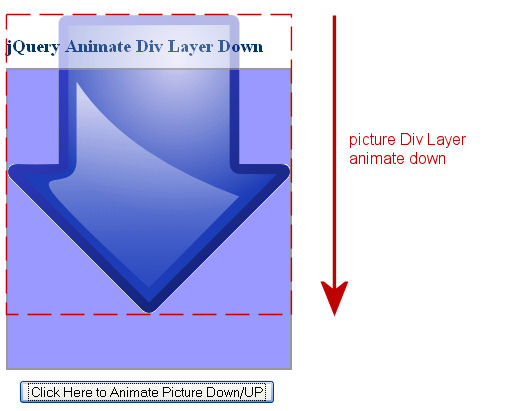
Case 2: Animating the Div Layer Back (Up)
It simply animate the picture Div Layer up and back to the original position thus creating an effect that the arrow image is hiding back to the top. The jQuery codes is:
$("#picture").animate({ "top": "-=" + heightShift + "px" });This is the end of jQuery Animate Div Layer Down Tutorial.
*****
jQuery Animate Div Layer Up
In previous jQuery tutorial, we learned how to animate a Div Layer down. In this tutorial, we show how to animate a Div Layer up. Actually the concept is the same. The only difference is the starting position of the picture Div Layer.
jQuery Demo
A demo of this jQuery tutorial is available. Click here to View Demo (Pop up window)
Goal of Animating Div Layer Down
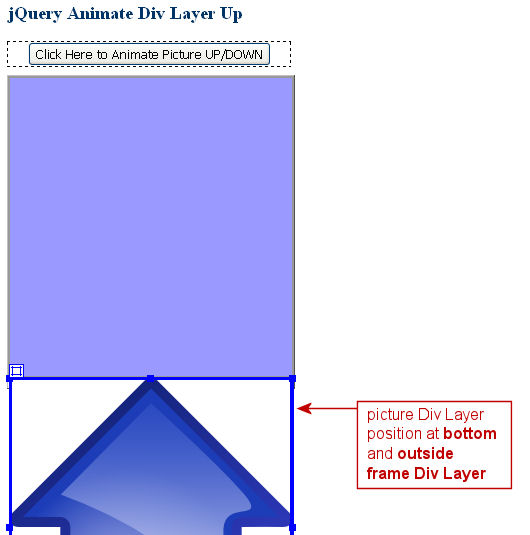
The following diagram is the starting layout of the Div Layers. The picture Div Layer is simply position and hidden at the bottom position. When the “Click Here to Animate Picture Down/Up” button is clicked, the picture div layer will animate up.
HTML Layout of Div Layers
This is the HTML code of the picture Div Layer:
<div id="frame">
<div id="picture"></div>
</div>
This is the styles of the picture Div Layer:
#picture {
position: absolute;
height: 298px;
width: 282px;
background-image: url(arrow_down.png);
background-repeat: no-repeat;
top: 302px;
}
And the styles of the frame Div Layer is:
#frame {
position: relative;
height: 298px;
width: 282px;
background-color: #99F;
border: 2px solid #999;
overflow: hidden;
margin-bottom: 10px;
}
Animate Div Layer Up and Return
The first thing to do is to get the outer height of the picture div layer. And then position the picture div layer at the bottom side just below the frame layer when the page loads. The jQuery codes are:
// Get the outer height of #picture Div
var heightShift = $("#picture").outerHeight();

// Set starting position of #picture Div
$("#picture").css( { top: heightShift + 'px'} );
There are two scenarios when animating the picture Div Layer.
Case 1: Animate the Div Layer Up
It simply animate the picture div layer up, creating an effect that the arrow image is rising up from above. The jQuery codes is:
$("#picture").animate({ "top": "-=" + heightShift + "px" });
Case 2: Animating the Div Layer Back (Down)
It simply animate the picture Div Layer down and back to the original position thus creating an effect that the arrow image is hiding back to the bottom. The jQuery codes is:
$("#picture").animate({ "top": "+=" + heightShift + "px" });This is the end of jQuery Animate Div Layer Up Tutorial.
*****
jQuery Animate Div Layer Right
In previous jQuery tutorials, we learned how to animate a Div Layer in down and up direction. In this tutorial, we show how to animate a Div Layer to right direction. Actually the concept is the same. The only difference is also the starting position of the picture Div Layer.
jQuery Demo
A demo of this jQuery tutorial is available. Click here to View Demo (Pop up window)
Goal of Animating Div Layer to Right
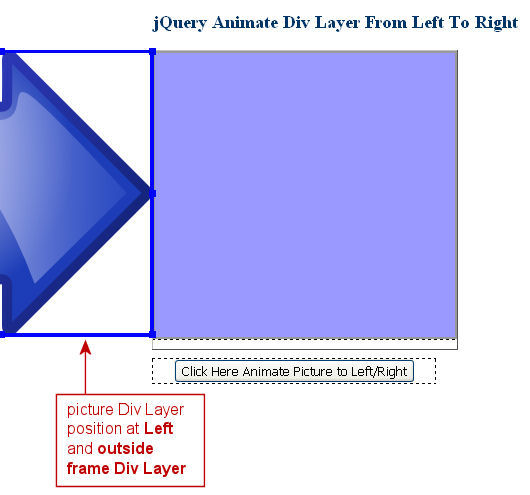
The following diagram is the starting layout of the Div Layers. The picture Div Layer is simply position and hidden at the left position. When the “Click Here to Animate Picture Left/Right” button is clicked, the picture div layer will animate to the right side.
HTML Layout of Div Layers
This is the HTML code of the picture Div Layer:
<div id="frame">
<div id="picture"></div>
</div>
This is the styles of the picture Div Layer:
#picture {
position: absolute;
height: 284px;
width: 300px;
background-image: url(arrow_down.png);
background-repeat: no-repeat;
top: 0px;
left: 317px;
}
And the styles of the frame Div Layer is:
#frame {
position: relative;
height: 284px;
width: 300px;
background-color: #99F;
border: 2px solid #999;
overflow: hidden;
margin-bottom: 10px;
}
Animate Div Layer Right and Back
The first thing to do is to get the outer width of the picture div layer. And then position the picture div layer at the left side just beyond the frame layer when the page loads. The jQuery codes are:
// Get the outer width of #picture Div
var widthShift = $("#picture").outerWidth();

// Set starting position of #picture Div
$("#picture").css( { left: -widthShift + 'px'} );
There are two scenarios when animating the picture Div Layer.
Case 1: Animate the Div Layer to Right
It simply animate the picture div layer to right direction, creating an effect that the arrow image is shooting from the left side. The jQuery codes is:
$("#picture").animate({ "left": "+=" + widthShift + "px" });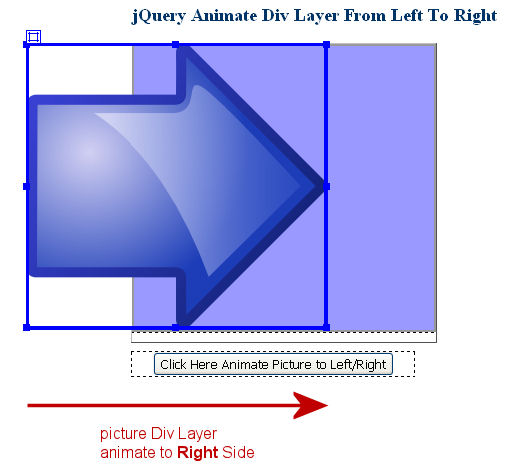
Case 2: Animating the Div Layer Back (Left)
It simply animate the picture Div Layer left and back to the original position thus creating an effect that the arrow image is hiding back to the left side. The jQuery codes is:
$("#picture").animate({ "left": "-=" + widthShift + "px" });This is the end of jQuery Animate Div Layer Right Tutorial.
*****
jQuery Animate Div Layer Left
This is the final jQuery tutorial of animating Div Layer. In this jQuery tutorial, we show how to animate a Div Layer to left direction. Actually the concept is the same. The only difference is also the starting position of the picture Div Layer.
jQuery Demo
A demo of this jQuery tutorial is available. Click here to View Demo (Pop up window)
Goal of Animating Div Layer to Left
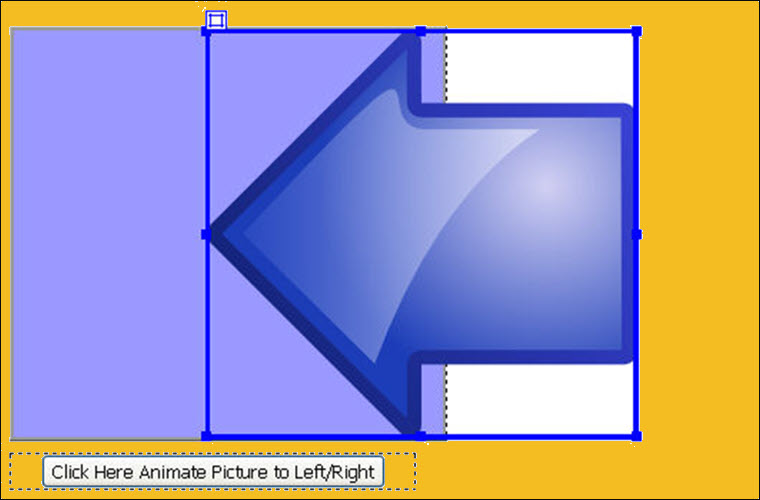
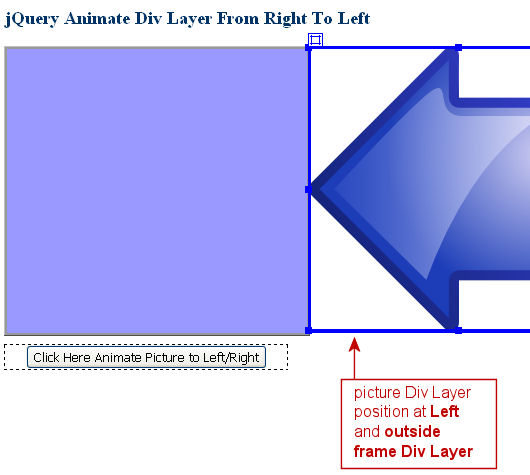
The following diagram is the starting layout of the Div Layers. The picture Div Layer is simply position and hidden at the right position. When the “Click Here to Animate Picture Left/Right” button is clicked, the picture div layer will animate to the left side.
HTML Layout of Div Layers
This is the HTML code of the picture Div Layer:
<div id="frame">
<div id="picture"></div>
</div>
This is the styles of the picture Div Layer:
#picture {
position: absolute;
height: 284px;
width: 300px;
background-image: url(arrow_down.png);
background-repeat: no-repeat;
top: 0px;
left: 137px;
}
And the styles of the frame Div Layer is:
#frame {
position: relative;
height: 284px;
width: 300px;
background-color: #99F;
border: 2px solid #999;
overflow: hidden;
margin-bottom: 10px;
}
Animate Div Layer Left and Return
The first thing to do is to get the outer width of the picture div layer. And then position the picture div layer at the left side just beyond the frame layer when the page loads. The jQuery codes are:
// Get the outer width of #picture Div
var widthShift = $("#picture").outerWidth();

// Set starting position of #picture Div
$("#picture").css( { left: widthShift + 'px'} );
There are two scenarios when animating the picture Div Layer.
Case 1: Animate the Div Layer to Left
It simply animate the picture div layer to left direction, creating an effect that the arrow image is shotting from the right side. The jQuery codes is:
$("#picture").animate({ "left": "-=" + widthShift + "px" });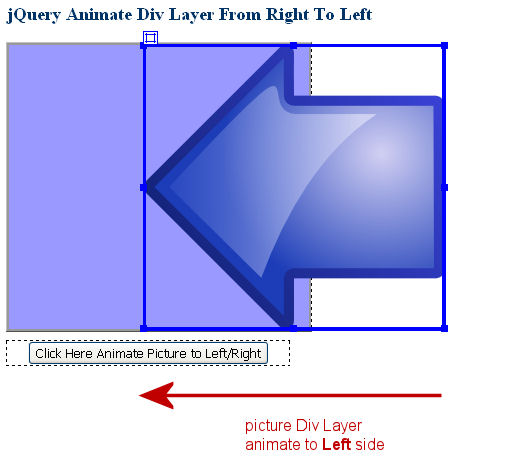
Case 2: Animating the Div Layer Right (Back)
It simply animate the picture Div Layer Right and back to the original position thus creating an effect that the arrow image is hiding back to the right side. The jQuery codes is:
$("#picture").animate({ "left": "+=" + widthShift + "px" });This is the end of jQuery Animate Div Layer Left Tutorial.
Leave a Reply