
In previous Blogger tutorials, we learnt how to customize the Header. However most people prefer a more attractive Header banner or logo at the top. The best method is add a background image to the Header. Let’s see how to do it in this series of Blogger tutorials.
Table of Contents
Revision of Blogger Header
Let’s take a look at the header again:
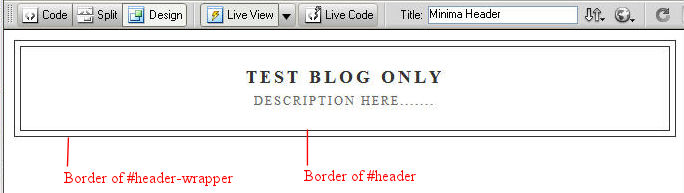
The outer border line of Blogger Header is set by the border property of #header-wrapper. Setting the border to zero will remove the outer border line.
#header-wrapper {
width:660px;
margin:0 auto 10px;
border:1px solid $bordercolor;
}
The inner border line of Blogger Header is set by the border property of #header. Setting the border to zero will remove the inner border line.
#header {
margin: 5px;
border: 1px solid $bordercolor;
text-align: center;
color:$pagetitlecolor;
}
We mentioned in previous tutorial that there is no height property set to the #header-wrapper. Therefore this is quite difficult to master the size and position of the background image. Actually many blogger found that the background image do not align to what they wish. Moreover many background images are also distorted due to the resize. Many Blogger tutorials told you to do this by trial and error.
We never do this by trial and error. Let’s see how to add the background image to Blogger Header fully under our control.
Set the height of the #header-wrapper
In order to add a background image to Blogger Header correctly, precisely and fully under control, this is better to set the height of the Header Wrapper.
#header-wrapper {
width:660px;
margin:0 auto 10px;
border:1px solid $bordercolor;
height: 150px;
}
The Dreamweaver screen is shown as below:
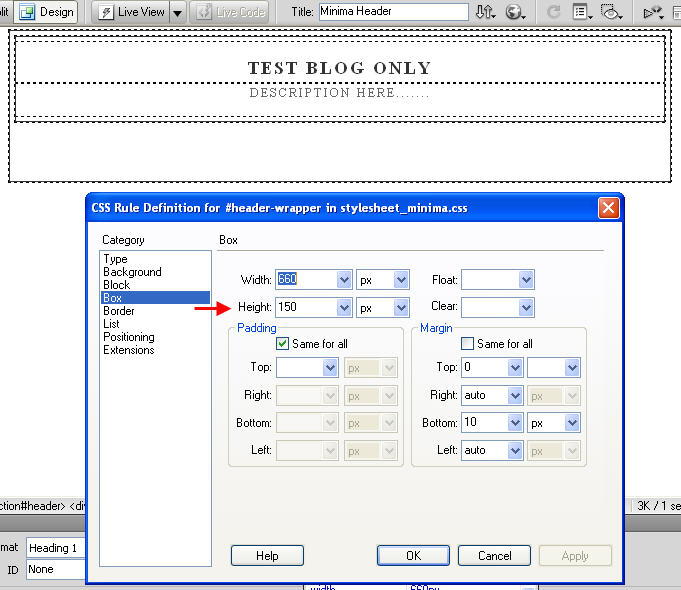
Now the size of #header-wrapper is 660 pixels in width x 150 pixels in height.
This Blogger section tutorial shows how to set the height for the Header Wrapper.
Prepare background Image and Add to Blogger Header
Since the size of #header-wrapper is 660 pixels in width x 150 pixels in height, we need to prepare an image with the same size.
Prepare a background image:
Prepare a background image (660 pixels x 150 pixels) for the Header with any photo software. In order to allow you to see the process easily, we made a very simple Header image with a rather light color. Here’s your Blogger Background image:

Add the Background Image to Blogger Header:
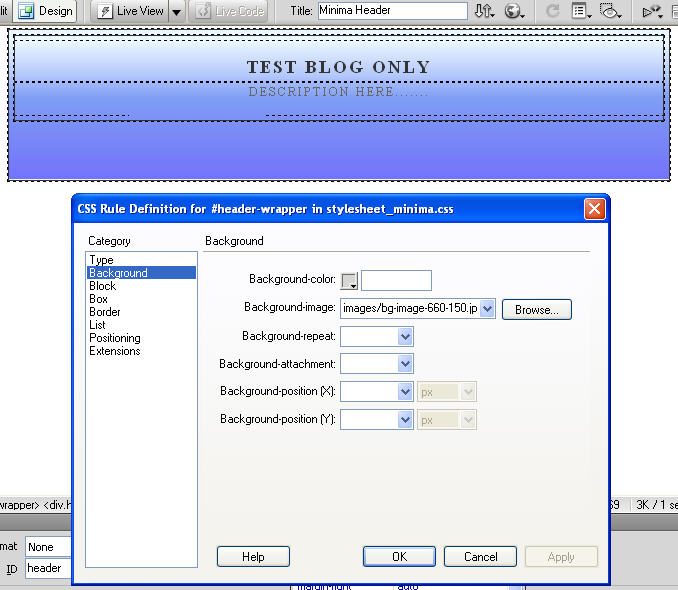
The background image will be set in the #header-wrapper. To do this, add the background-image property to #header-wrapper
#header-wrapper {
width:660px;
margin:0 auto 10px;
border:1px solid $bordercolor;
height: 150px;
background-image: url(images/bg-image-660-150.jpg);
}
Note:
When edit in Blogger website, you should use the background-image property like:
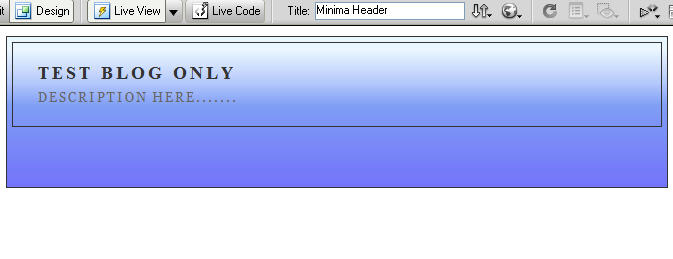
background-image: url(https://YourImageLoc.com/bg-image-660-150.jpg);The background image should align perfectly since the size of the image is exactly the same as the size of Header Wrapper. The result is shown as the picture below:
This Blogger section tutorial shows how to set or add a background image to Header.
Align Position of Title and Description to Match the Header Image
Most people like to paint the Title and Description in the Background Image and then remove the text of the Header Title and Description. Of course this is an easy way to prepare the Header Image. However, I don’t suggest you to do that. Because the robots and spiders of Search Engine like to eat the text of Header Title and Description that appear first after the body of your blog. Then Search Engines will index your web pages and rank your pages higher.
As we shown in previous tutorial, align the Title and Description to the Left by changing the Text-align property from center to Left.
#header {
margin: 5px;
border: 1px solid $bordercolor;
text-align: left;
color:$pagetitlecolor;
}
The result is shown in the picture below:

Indent the Description:
If you like to indent the Description a bit. This can be done by increasing the padding (e.g. from 20 pixels to 35 pixels). Please see previous tutorial. Here’s the code:
#header .description {
margin:0 5px 5px;
padding:0 20px 15px;
max-width:700px;
text-transform:uppercase;
letter-spacing:.2em;
line-height: 1.4em;
font: $descriptionfont;
color: $descriptioncolor;
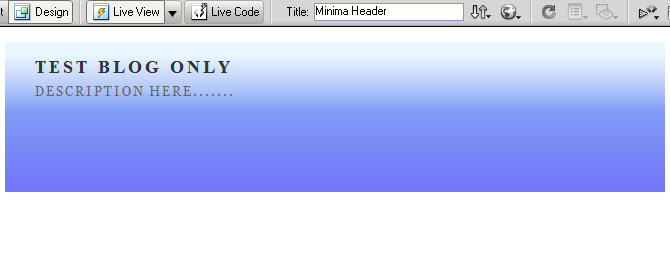
}The Blogger Header now look like:
This Blogger section tutorial show how to align the text of Title and Description of Header.
Remove the Outer Border Line and Inner Border of Header
Do you like the two lines – Outer Border line and the Inner Border line?
Of course not! Let’s remove them. Actually we already learned this in previous tutorial. Let’s shown how to do it once again.
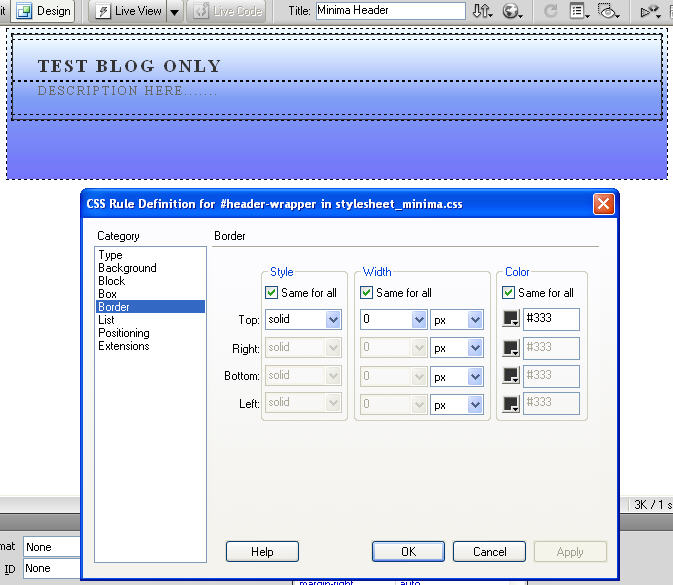
Remove Outer Border
It simply change the border of #header-wrapper from 1 pixel to zero
Change from:
#header-wrapper {
width:660px;
margin:0 auto 10px;
border:1px solid $bordercolor;
height: 150px;
background-image: url(images/bg-image-660-150.jpg);
}
to
#header-wrapper {
width:660px;
margin:0 auto 10px;
border:0px solid $bordercolor;
height: 150px;
background-image: url(images/bg-image-660-150.jpg);
}
Here’s the screen of Dreamweaver:
Remove Inner Border
It simply change the border of #header from 1 pixel to zero
Change from:
#header {
margin: 5px;
border: 1px solid $bordercolor;
text-align: left;
color:$pagetitlecolor;
}
to
#header {
margin: 5px;
border: 0px solid $bordercolor;
text-align: left;
color:$pagetitlecolor;
}
The Dreamweaver screen now looks like:
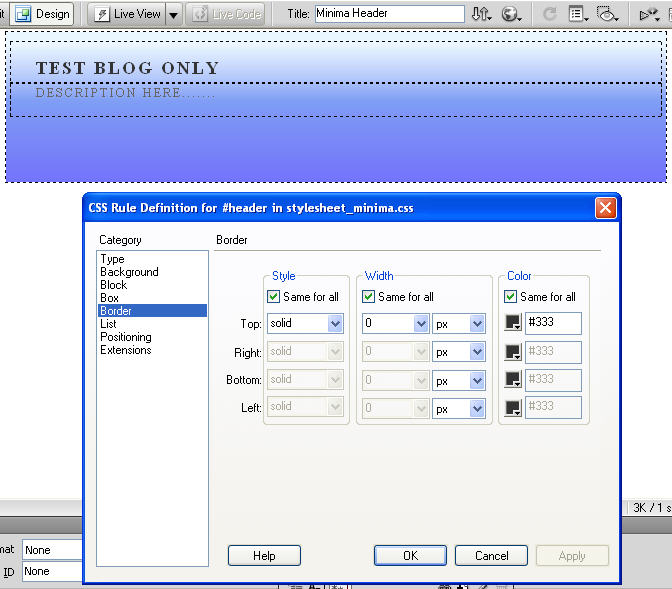
This Blogger tutorial shows how to remove the two border lines on the Header.
Final Result of Adding Background Image to Header
It’s time to see the result!
After your codes have been tested in Dreamweaver, it’s time to update your blogger website. You can ajust the position, font color, of the Title and Description easily. Please check our previous tutorials.
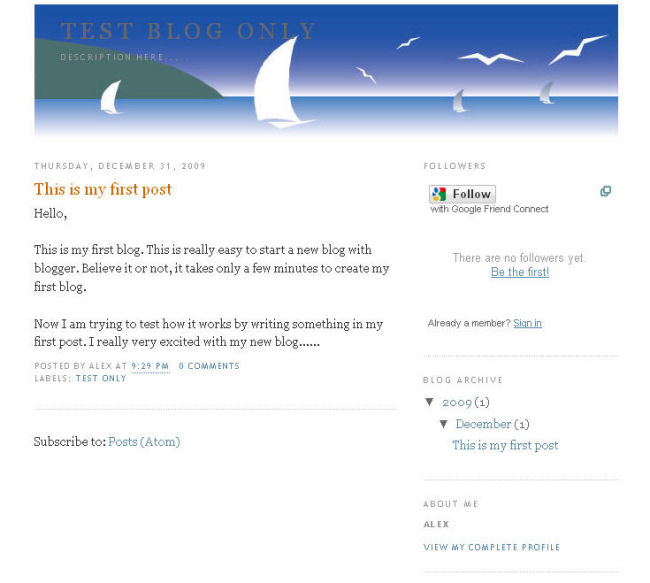
This Blogger section tutorial shows how to add background image to Header with correct size and position, fully under control rather than by trial and error.
Leave a Reply