For most blogger, the only theme they consider to customize is the Header. Therefore it pays to spend some time to study the HTML codes (CSS codes actually) of the Blogger Header. Once you are familar with the HTML codes of the Blogger header, you are able to design the Blogger Header of your own.
Oky! Let’s get started…
The most easiest way to study the HTML codes of Blogger is using Dreamweaver. Blogger use a single file for the CSS styles and HTML webpage. However I personally like to use an external CSS style sheet. Therefore I split and copied the Blogger HTML codes into a HTML webpage and an external CSS Stylesheets.
You can click here to download the Blogger dreamweaver source file if you like.
Note:
In this tutorial, I only copied the Header Section of the webpage.
Table of Contents
Overview of Blogger Header
Design View of Blogger Header:

Live View of Blogger Header:
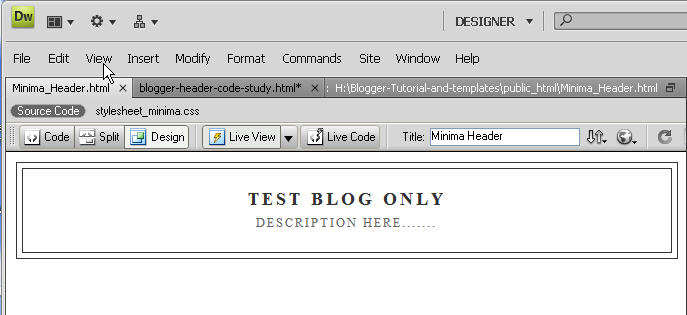
This Blogger tutorial simply shows what is the Header.
Outer Wrapper of Blogger
Before checking the Header, let’s take a look at the outer wrapper that hold the contents of the Blog. The Outer Wrapper is the div layer that hold all the contents of the blog. In other words, all contents (Header, Main contents, Sidebar and Footer) are residued inside the Outer Wrapper.
Here’s the codes:
/* Outer-Wrapper
----------------------------------------------- */
#outer-wrapper {
width: 660px;
margin:0 auto;
padding:10px;
text-align:$startSide;
font: $bodyfont;
}
Pay attention to the width of Outer Wrapper:
Blog width of Minima template: 660 pixel
This Blogger tutorial shows the style of Outer Wrapper.
Header Wrapper of Blogger
It’s time to study the codes of the Blogger Header. Header Wrapper is the div layer that holds the Header.
/* Header
-----------------------------------------------
*/
#header-wrapper {
width:660px;
margin:0 auto 10px;
border:1px solid $bordercolor;
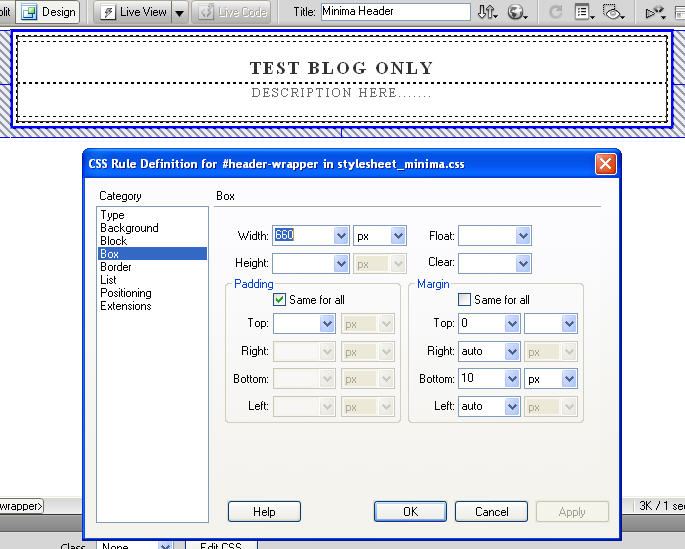
}Pay attention to the width and margin of Header Wrapper:
Width of Header Wrapper: 660 pixel
Margin of Header Wrapper: There is a 10 pixel margin at the bottom. It provides some space between the Header and the Contents below.
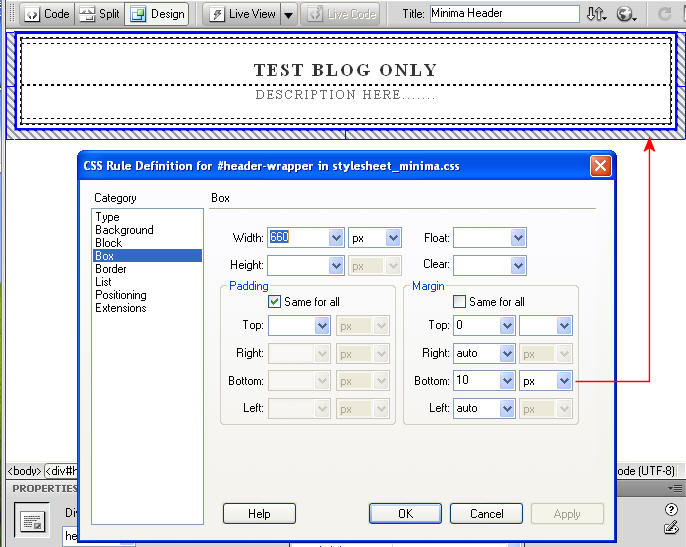
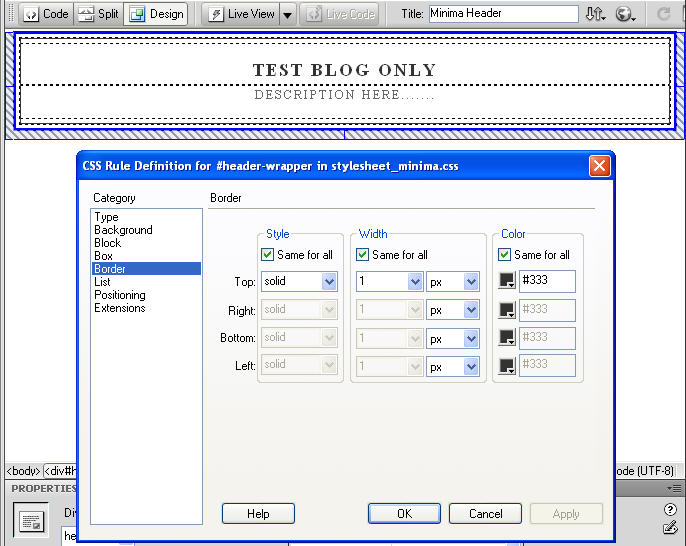
Also pay attention to the border of Header Wrapper:
Border of Header Wrapper: 1 pixel width
Ah… This is the outer black border of the Header
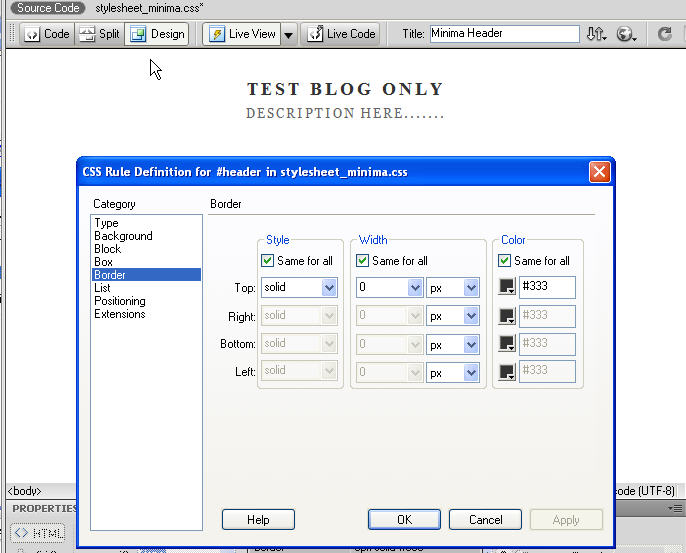
Note: If you do not want the outer border, set the width to zero.
Setting the width to zero will remove the outer border as shown below:

Note:
You should wonder that there is no height set for the Header. The main reason is that it can be more flexible for all users. For example, some users may be using a long Title (TEST BLOG ONLY………..) that across two lines, some users may use a long description (DESCRIPTION HERE and HERE…….) that across a few lines. In both cases, the text will push the Header Wrapper down. However if you use a background image for the Header, this is better to set the height of the Header Wrapper.
This Blogger tutorial shows the style of Header Wrapper.
Header HTML Code of Blogger
The Header Div Layer is residued inside the Header Wrapper Layer. In other words, the Header Wrapper layer holds the Header layer inside.
Here’s the HTML codes of the Header:
#header {
margin: 5px;
border: 1px solid $bordercolor;
text-align: center;
color:$pagetitlecolor;
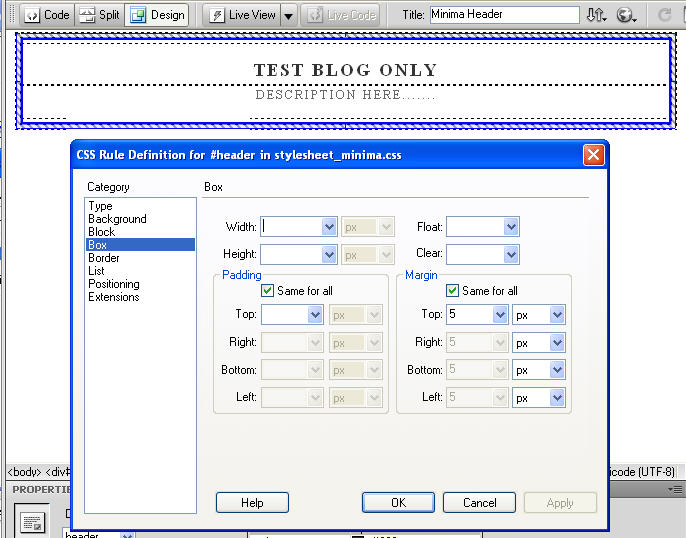
}Pay attention to the margin:
Margin of Header: There are a 5 pixels margin around the four sides.
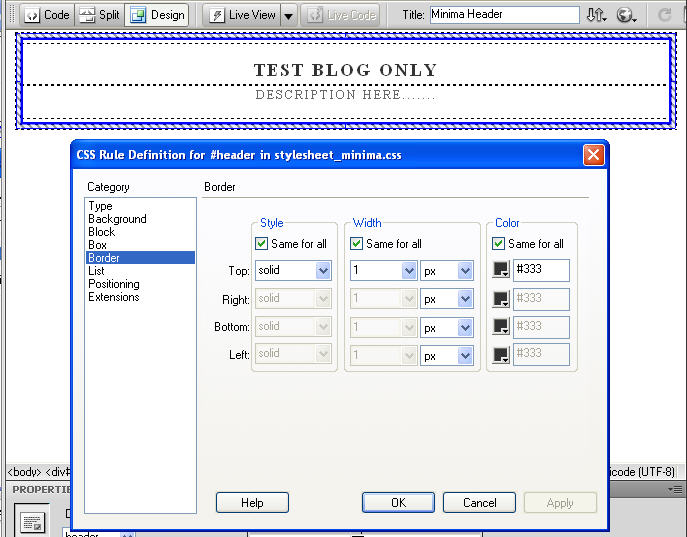
Also pay attention to the border:
Border of Header: 1 pixel width. This is the inner black border of the Header.
You can also remove it if you set the width to zero.
By setting the width of border of #header to zero, the inner border will be removed as shown below:
Conclusion:
Now, let’s review what we learnt before:
The two grey border lines of the Blogger Header are setting in:
The outer border is set in the Header Wrapper. #header-wrapper (line 88 -92)
#header-wrapper {
width:660px;
margin:0 auto 10px;
border:1px solid $bordercolor;
}
The inner border is set in the Header.
#header ID Selector (line 100 – 105)
#header {
margin: 5px;
border: 1px solid $bordercolor;
text-align: center;
color:$pagetitlecolor;
}
The two border lines can be removed by setting the borders of #header-wrapper and #header to zero, as shown below:
#header-wrapper {
width:660px;
margin:0 auto 10px;
border:0px solid $bordercolor;
}
#header {
margin: 5px;
border: 0px solid $bordercolor;
text-align: center;
color:$pagetitlecolor;
}Okay! we already knew the styles of Header Wrapper and Header of Blogger. In the next tutorial, we will customize the Blogger.
Setting Background Color of Blogger Header
We already knew the HTML codes of the Blogger Header, it is time to customize the Header.
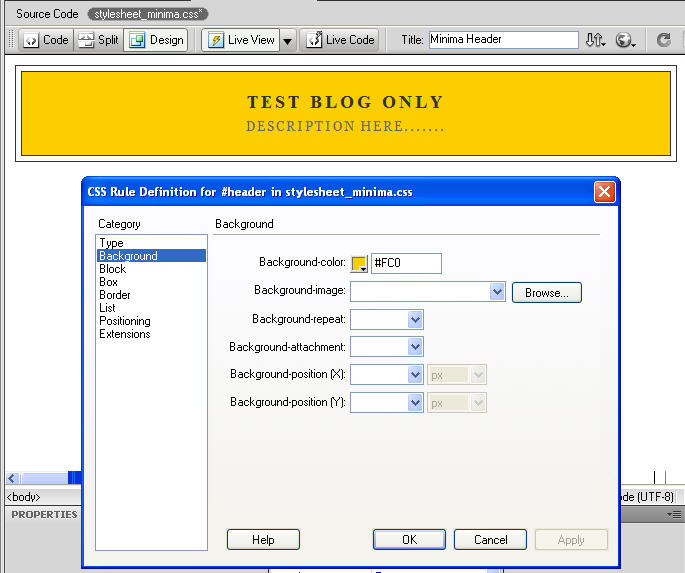
You can use the background-color property to set the background color of the header.
#header-wrapper
#header-wrapper {
width:660px;
border:1px solid #333;
margin-top: 0;
margin-right: auto;
margin-bottom: 10px;
margin-left: auto;
background-color: #FC0;
}
The background of the whole Blogger Header will be filled with color as shown below. Since the Header Wrapper is the outer layer, the whole Header will be filled with color.

#header
#header {
margin: 5px;
border: 1px solid #333;
text-align: center;
color:#333;
background-color: #FC0;
}
Remember that the Header layer is the INNER layer that residue inside the Header Wrapper? Since there are 5 pixels margin around the outside of #header, the result will be shown as the picture below:
This Blogger section tutorial shows how to customize the background color of Header.
Blogger Header Title and Description
Before we customize the Header Title and Description, we need to know how the styles defined them.
The #header h1 tag define the styles or appearances of the Blogger Header Title.
#header H1 Tag for the Title
#header h1 {
margin:5px 5px 0;
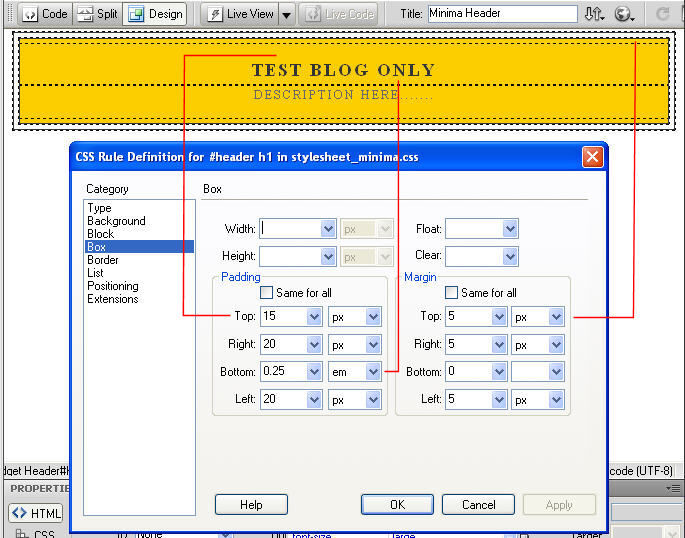
padding:15px 20px .25em;
line-height:1.2em;
text-transform:uppercase;
letter-spacing:.2em;
font: $pagetitlefont;
}The top Padding (15 pixels) and top Margin control the space in the top, and
The bottom Padding (0.25 em) control the space beneath it.
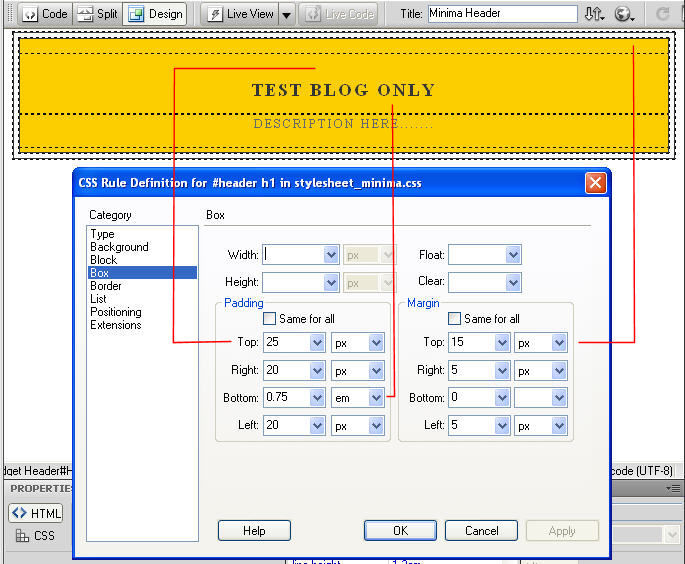
By increasing the top Padding to 25 pixels, bottom Padding to 0.75 em and top Margin to 15 pixels, the effect will be shown as below:
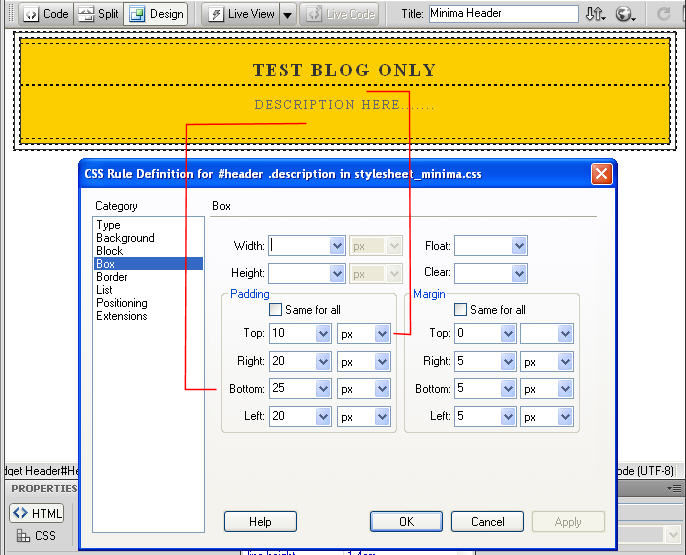
The #header .description tag define the styles or appearances of the Blogger Header Description.
#header Description
#header .description {
margin:0 5px 5px;
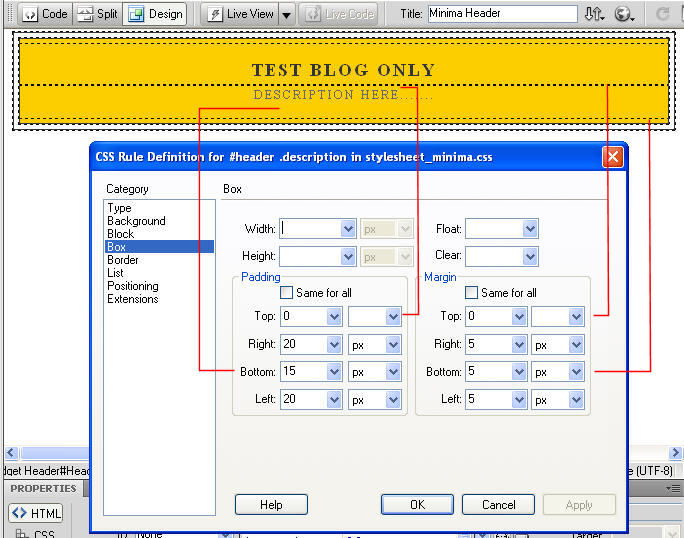
padding:0 20px 15px;
max-width:700px;
text-transform:uppercase;
letter-spacing:.2em;
line-height: 1.4em;
font: $descriptionfont;
color: $descriptioncolor;
}The top Padding (0 pixel) and top Margin (0 pixel) control the space in the top, and
The bottom Padding (15 pixels) control the space beneath it.
By increasing the top Padding to 10 pixels, bottom Padding to 25 pixels, the effect will be shown as below:
We now knew how the CSS styles control the Header Title and Header Description. Let’s customize the Blogger Header Title and Header Description now.
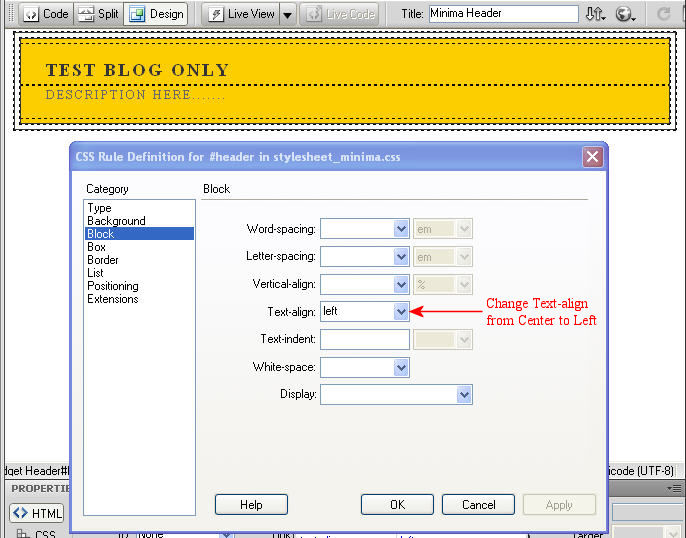
Align Header Title and Header Description to Left
By default, the Blogger Header and Title are aligned in the center. They can be aligned to the left (or right) easily by changing the text-align property of the Header.
#header {
margin: 5px;
border: 1px solid $bordercolor;
text-align: left;
color:$pagetitlecolor;
}
Here’s the result:
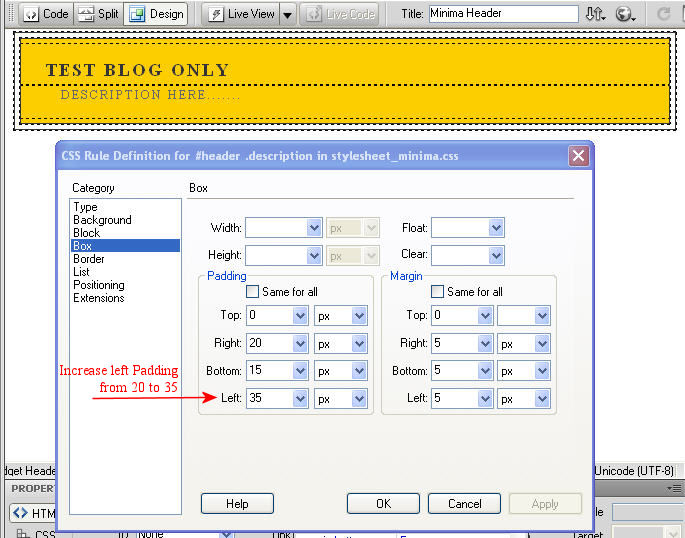
Indent the Header Description
Most people would like to indent the Description a bit from the Title. This can be done by increasing the padding (e.g. from 20 pixels to 35 pixels).
Note: The style of Blogger Header Description is controlled by the “#header .description” tag.
#header .description {
margin:0 5px 5px;
padding:0 35px 15px;
max-width:700px;
text-transform:uppercase;
letter-spacing:.2em;
line-height: 1.4em;
font: $descriptionfont;
color: $descriptioncolor;
}
Here’s the result:
This Blogger section tutorial shows how to align the text of Header Title and Header description.
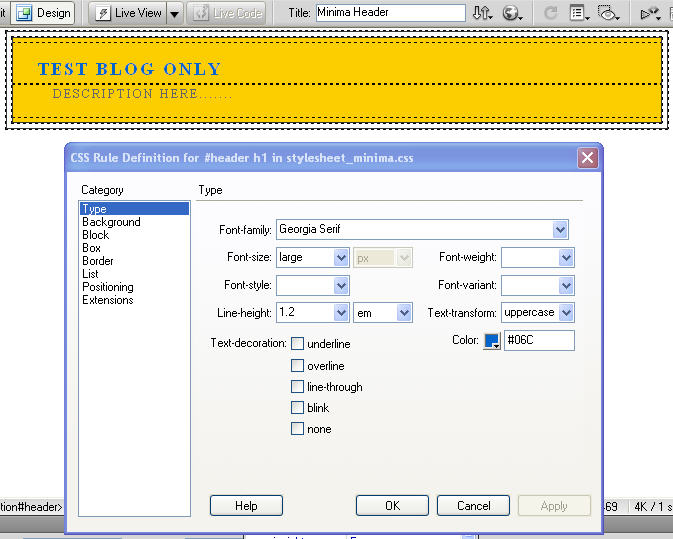
Change Font Color of Blogger Header Title and Description
Blogger Header Title:
To change or edit the Font Color of the Blogger Header Title, edit the color property of #header h1 as shown below:
#header h1 {
margin:5px 5px 0;
padding:15px 20px .25em;
line-height:1.2em;
text-transform:uppercase;
letter-spacing:.2em;
color: #06C;
}
Here’s the result:
Header Description:
To change the Font Color of the Blogger Header Description, edit the color property of #header .description as shown below:
#header .description {
margin:0 5px 5px;
padding:0 20px 15px;
max-width:700px;
text-transform:uppercase;
letter-spacing:.2em;
line-height: 1.4em;
font: $descriptionfont;
color: #096;
}
Here’s the result:
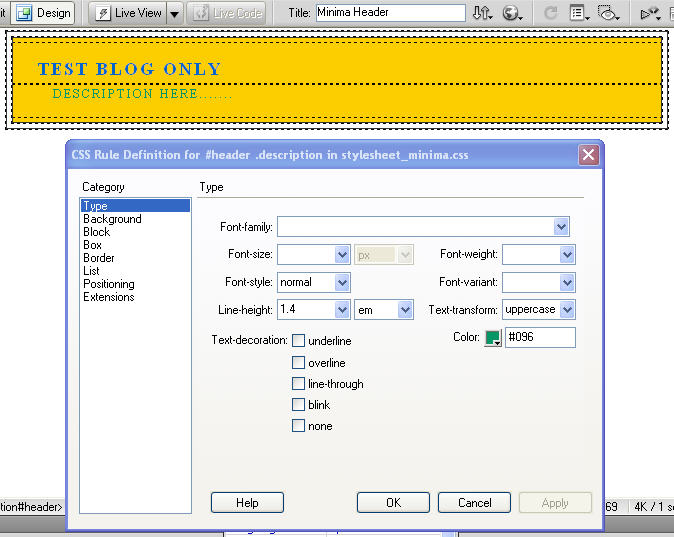
This Blogger section tutorial shows how to change the Font Color of Header Title and Description.
Leave a Reply