Toon Boom cut-out character is simply a character build up with pieces (e.g. head, neck, left arm, right arm, left leg, right legs, etc… The purposes of cutting a character into pieces is for ease of animation. You can animate the character by giving it a slightly different pose on each frame.
Remember that you need to assemble a cut-out character into an easy way for animation later. The complexity of the assembly depends entirely on how you plan to animate the cut-out character.
This Toon Boom Studio tutorial series show how to create a cut-out cartoon character intended for minimum usage from scratch.
Table of Contents
Create Head of Cut-Out Character
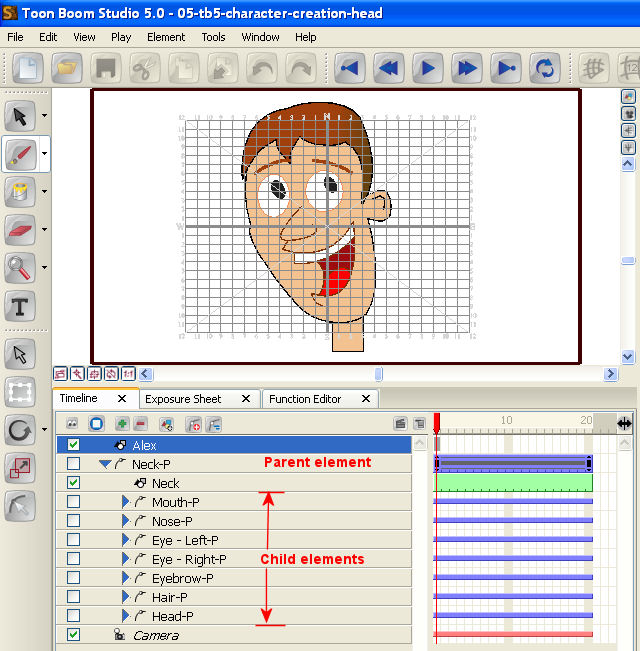
This Toon Boom Studio tutorial series shows how to create a cut-out cartoon character from scratch. Let’s start with the head and the neck.
Remember that you need to assemble a cut-out character into an easy way for animation later. The complexity of the assembly depends entirely on how to plan to animate the cut-out character.
The completed animation of this section is shown below:
Toon Boom Create Head Tutorial Movie
Toon Boom Create Head Tutorial Tips:
Cut-out characters are assembled in a hierarchy order with pegs. The assembly of the cut-out elements are a parent and child relationship. In short the child elements can be animated alone. While the animation of the parent elements will adhered to the child elements. For example the arm and forearm is a parent and child relationship. The forearm (child) can be moved individually without affect the arm (parent). However, the movement of arm (parent) will be carried to forearm (child). The forearm must be moved together with the arm.
*****
Forearm Movement of Cut-Out Character
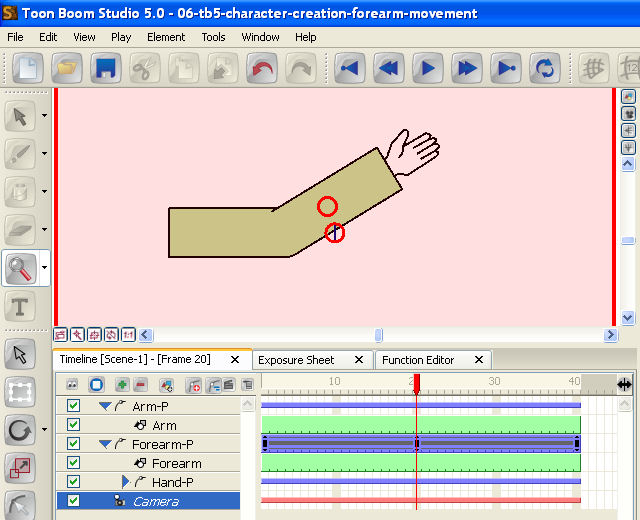
Before creating the body of the cut-out cartoon character, let’s take a look how to assembly the arm element and forearm element. In this tutorial, we focus mainly on the movement of the forearm.
The completed animation of this section is shown below:
Toon Boom Forearm MovementTutorial Movie
Toon Boom Forearm Movement Tutorial Tips:
There should be some methods for the joint movement or animation. We found this method quite easy to do the joint rotation movement.
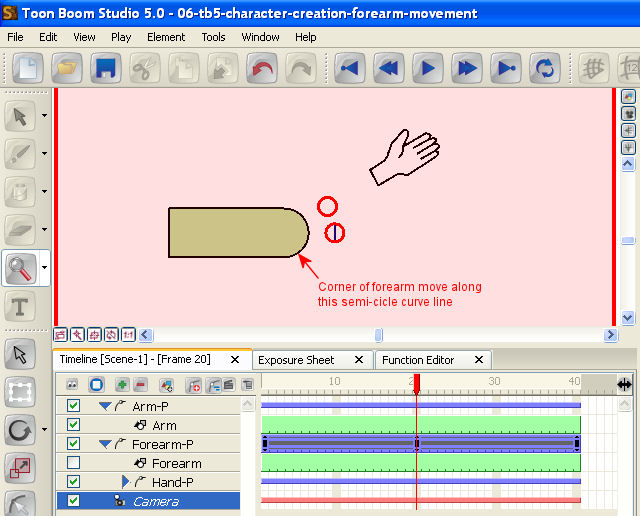
When the above element (e.g. forearm) rotate, it’s corner (in this example, the lower corner of forearm) will move along the semi-circle line of the below element (e.g. arm).
*****
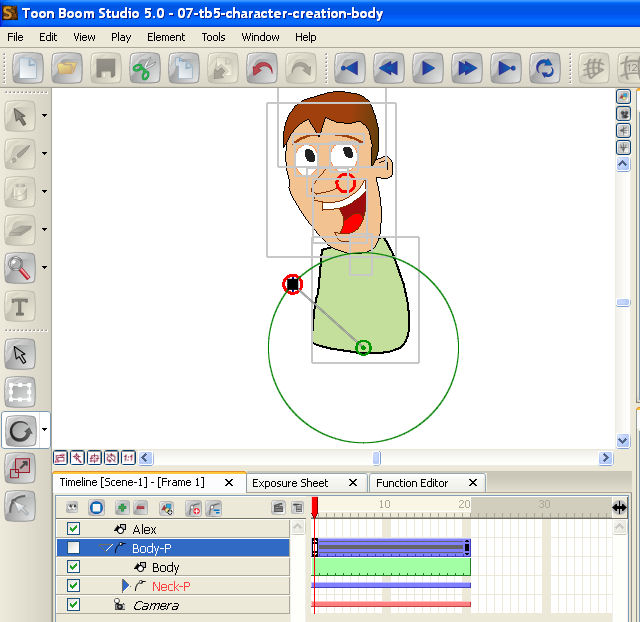
Create Body of Cut-Out Character
The body part of cut-out cartoon character should be an easier part to create. Remember that the body is parent of left hand and right hand.
Since the neck, left arm and right arm will be assemble with the body, it also need to think how the arms will be attached to the body. In most cases, a thin arm is relatively easy to assemble and rotate in the body part.
The completed animation of this section is shown below:
Toon Boom Create Body Tutorial Movie
Toon Boom Create Body Tutorial Tips:
When the body moves, the neck (thus the head) will be followed. Therefore the body is a parent element of the neck element.
*****
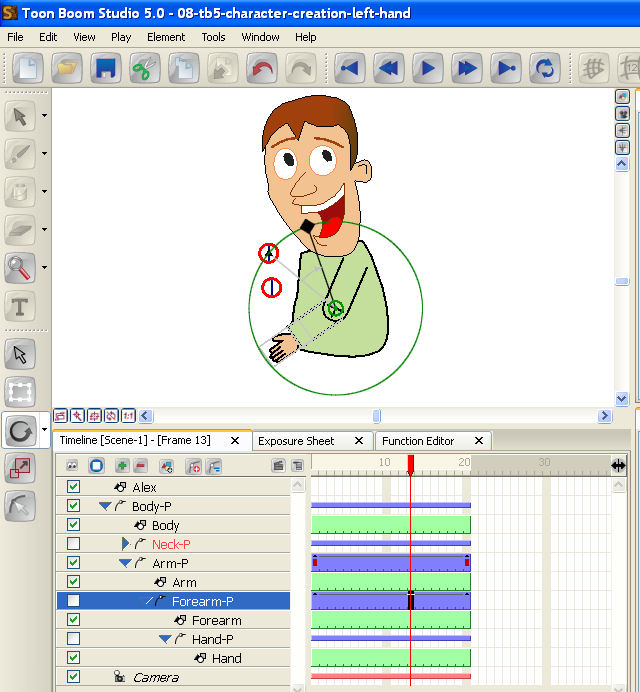
Create Left Hand of Cut-Out Character
The movement of the forearm is already discussed in previous Toon Boom tutorial. The animation of the arm is rather easy.
The completed animation of this section is shown below:
Create Left Hand Video Tutorial:
Toon Boom Create Left Hand Tutorial Tips:
Mark the pivot point on the forearm. If you are satisfied with the movement of the forearm, erase the mark.
*****
Create Right Hand of Cut-Out Character
The Toon Boom Tutorial is similar to the left hand tutorial. The only difference is that the right hand is behind the body.
The completed animation of this section is shown below:
Toon Boom Create Right Hand Tutorial Movie
Toon Boom Create Right Hand Tutorial Tips:
Try the movement of right hand in front of the body for better control. When you are satisfied with the result, move the right hand back to the body.

*****
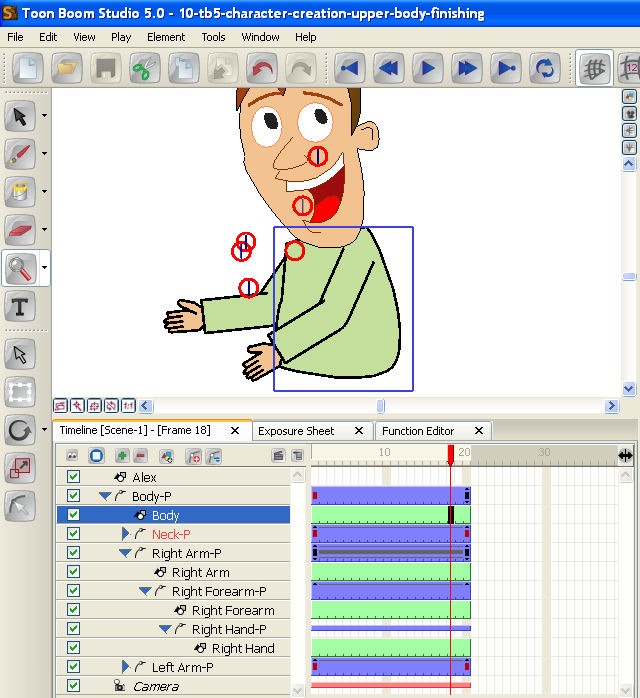
Upper Body Finishing of Cut-Out Character
Up to this Toon Boom tutorial, the upper body of the cut-out cartoon character is almost finish. Let’s remove the pivot mark on the left forearm and right forearm. It’s also time to test the animation of the upper body.
The completed animation of this section is shown below:
Upper Body Finishing Video Tutorial:
Upper Body Finishing Tutorial Tips:
Prepare the drawings of arm and forearm in other drawing programs (e.g. Adobe Illustrator). This is much easier to mark the pivot points. Note that the left arm and right arm are the same except the hands.
*****
Leg Movement of Cut-Out Character
Before creating the right leg and left leg of the cut-out cartoon character, let’s take a look how to assembly and animate the thigh and calf element.
The completed animation of this section is shown below:
Leg Movement Video Tutorial:
Leg Movement Tutorial Tips:
The assembly and animation of leg is similar to the hand.

*****
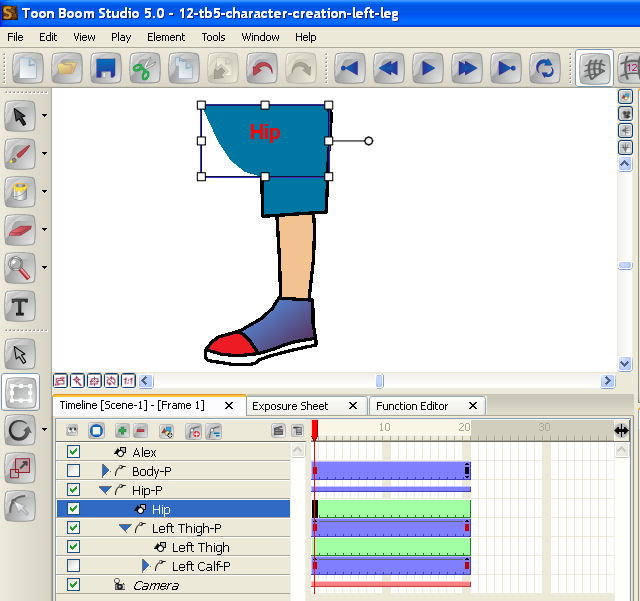
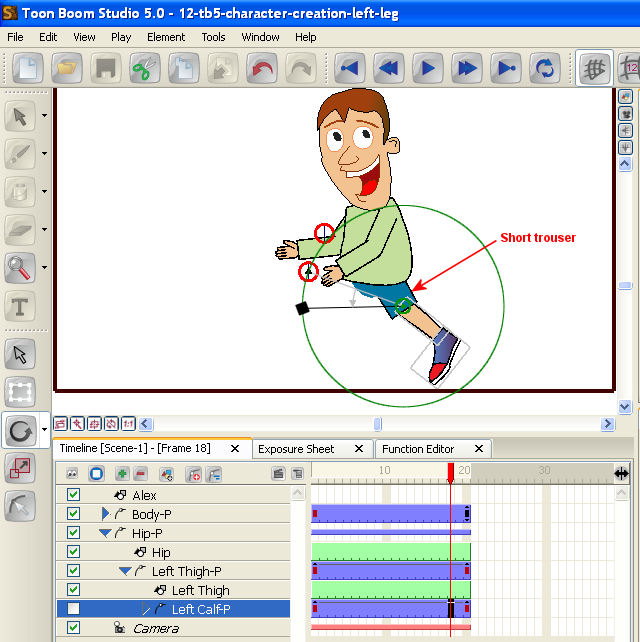
Create Left Leg of Cut-Out Character
The animation and movement of leg was discussed in previous Toon Boom tutorial. This tutorial shows how to assembly and animate the cut-out left leg.
The completed animation of this section is shown below:
Create Left Leg Video Tutorial
Create Left Leg Tutorial Tips:
Create a Hip element to hold the leg. The Hip will be a parent element of the leg leg and right leg.
For a much easier assembly and animation of the calf, wear a short trouser for the thigh. This way, the pivot point of the calf only need to located roughly inside the short trouser.
*****
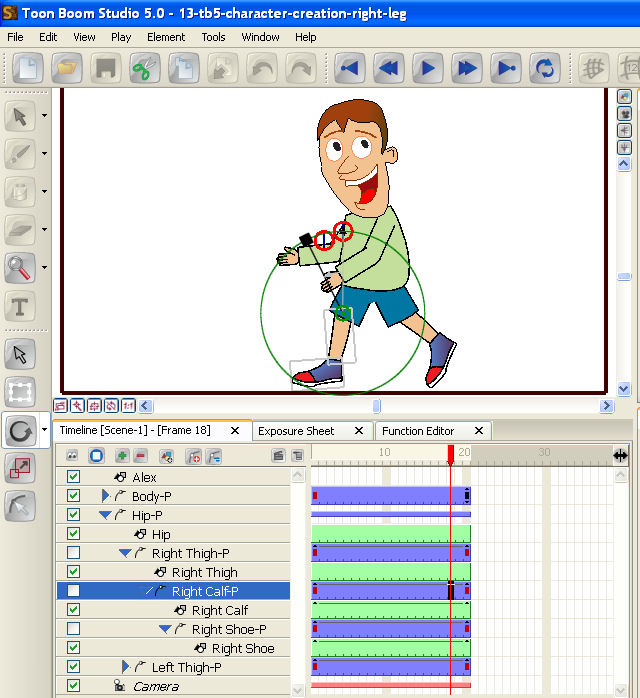
Create Right Leg of Cut-Out Character
The assembly and animation of cut-out right leg is similar to the left leg.
The completed animation of this section is shown below:
Create Right Leg Video Tutorial
Create Right Leg Tutorial Tips
Hide the left leg for easier control when assembly and animate the right leg.
*****
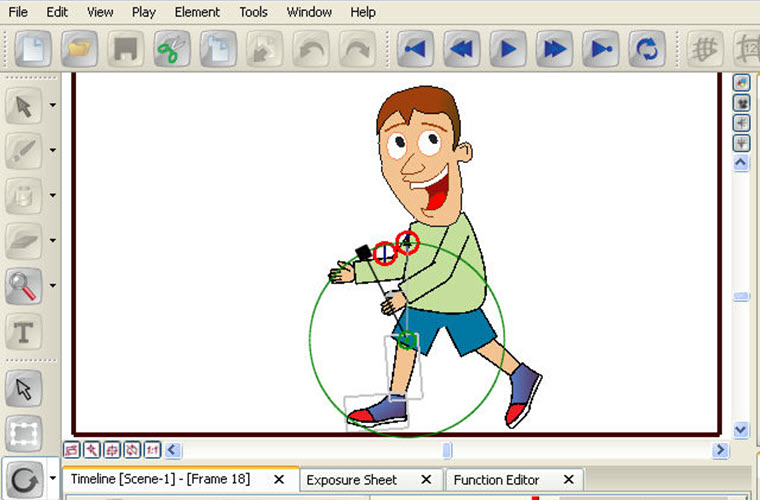
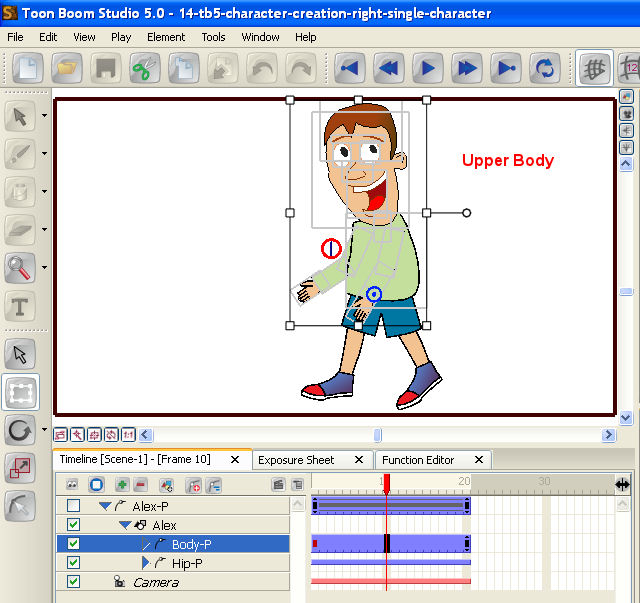
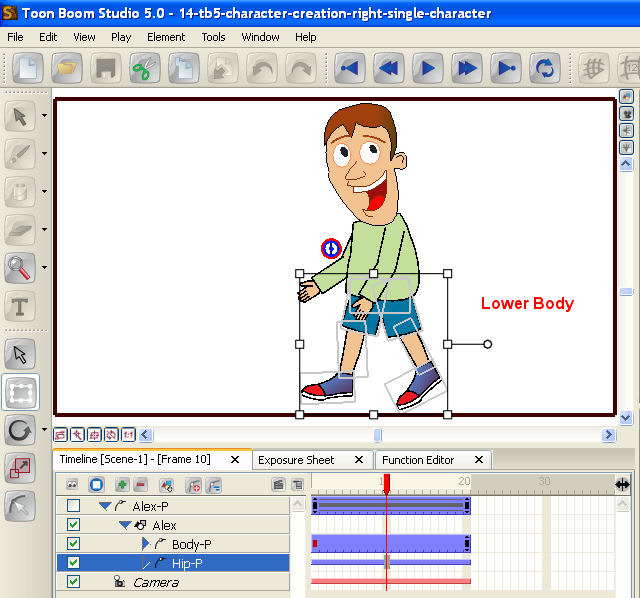
Single Cut-Out Character Final Step
The cut-out character is almost finish. However you should noticed that the upper body and the lower body are moved seperately. We need to think how can we moved the upper body and lower body to-gether.
The best solution is to create a parent element (e.g. name of the cartoon character) so that the upper body and the lower body are a child of this element. Therefore we can move the cartoon character with the parent element.
The completed animation of this section is shown below:
Single Cut-Out Character Final Step Video Tutorial
Single Cut-Out Character Final Step Tutorial Tips
By creating a new parent element, with the upper body and lower body as child element, the whole character can be animated easily.
Finished!
Leave a Reply