WordPress Widgets provide an easy and simple way to add features, for example, Calendar, Search Box, etc., to any location of blog. The procedures in creating widgets for parent themes or child themes are almost the same. Let’s continue with the alexten child theme that we created in previous posts.
WordPress Create Widget Area for Child Theme (Part 1)
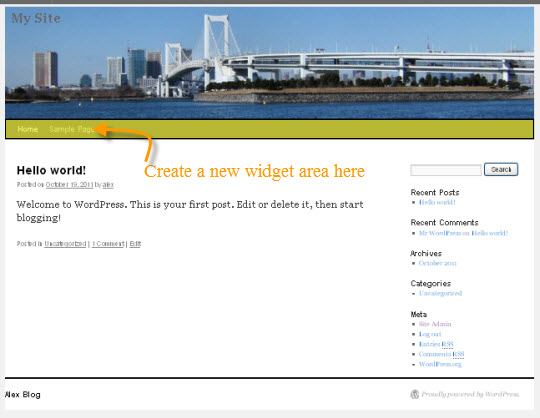
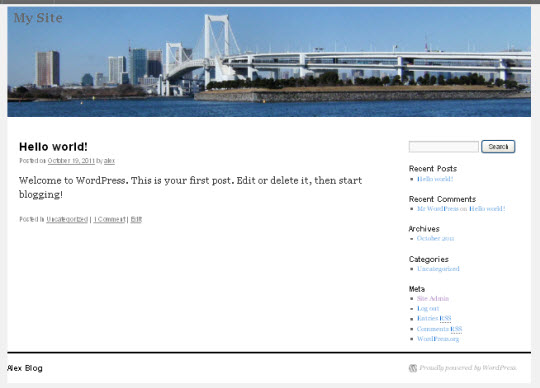
Take a look at the WordPress blog with alexten child theme:
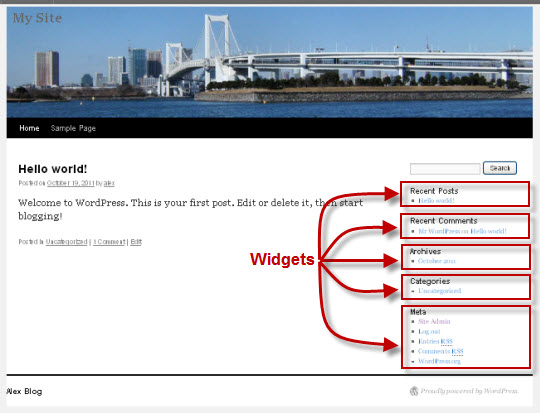
The contents at the Sidebar, Recent Posts, Recent Comments, Archives, Categories and Meta are actually WordPress widgets.
WordPress widgets can be manage in the Admin Control Panel. Log in the Admin Panel and navigate to Dashboard -> Apperance -> Widgets.
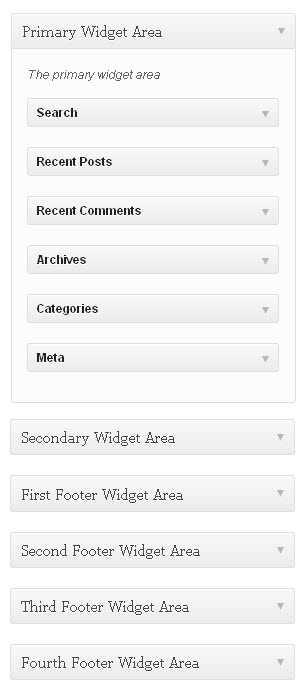
On the right side is the Widget Area. The upper side shows the widgets that are already inserted into the blog. The lower side shows other widget areas.
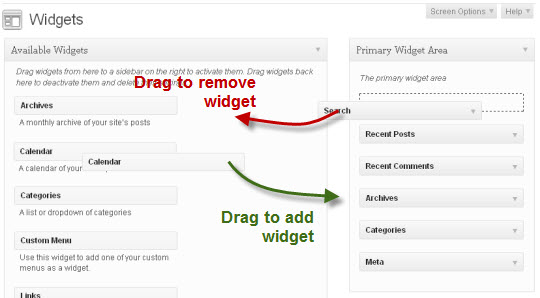
A widgets can easily be removed from the widget area, or insert into a widget area. To remove a widget, simply drag it away from the widget area back to the Available Widgets or Inactive Widgets. To add a widget, drag a widget from the Available Widgets or Inactive Widgets to an empty widget area.
The default WordPress Twenty Ten theme has 6 default widget areas, namely the Primary Widget Area, Secondary Widget Area, First Footer Area, Second Footer Area, Third Footer Area and Fourth Footer Area.
Sometimes the default widget areas are not suitable to use. For example, we wish to add a widget to the header or navigation menu. Therefore this is necessary to know how to create new widget area.
Remember that all WordPress themes may have different number of widgets and different widget areas. Therefore if you switch to other WordPress themes, some widgets feature may be lost.
WordPress Create Widget Area for Child Theme (Part 2)
Creating a new WordPress widget area is rather easy and simple. Two files are usually involved – functions.php and the file that used to display the widget. Actually it involves the following two steps in order to create a new widget area:
- Register the new widget in functions.php file. We need to tell WordPress program that we need to add a new widget.
- Add the new widget to the required location, for example, header, so that it will be displayed when the codes are executed.
Confused? Okay, let’s start creating a new widget area and everything should be cleared.
Create New Widget Area at Navigation Bar
We are going to create a new widget area in the top navigation bar. Remember that the new widget area can be anywhere on the blog.
Register New Widget in functions.php File
The first step is to register the new widget in functions.php file. I noticed that many web designers register the new widget in functions.php of the parent theme directly as shown below:
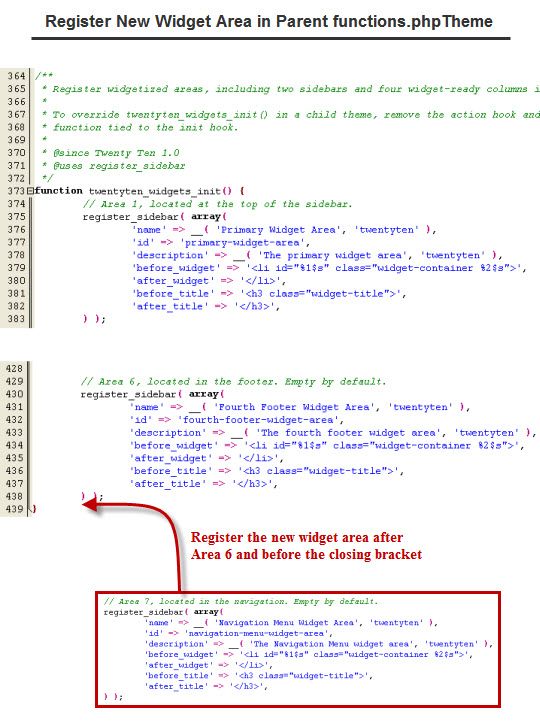
Since we are going to create the new widget area for our WordPress child theme, this is better not to modify the functions.php file of the parent twentyten theme. The procedures are very simple:
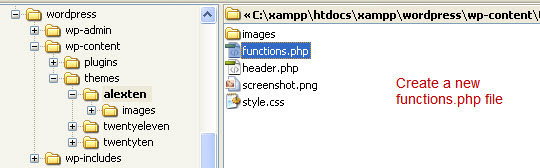
1. Create a new functions.php under the alexten child theme.
2. Register the new widget area with the new functions.php file of the child theme. The codes are:
<?php


// New Widget Area, located in the navigation menu. Empty by default.
register_sidebar( array(
‘name’ => __( ‘Navigation Menu Widget Area’, ‘twentyten’ ),
‘id’ => ‘navigation-menu-widget-area’,
‘description’ => __( ‘The navigation widget area’, ‘twentyten’ ),
‘before_widget’ => ‘<li id=”%1$s” class=”widget-container %2$s”>’,
‘after_widget’ => ‘</li>’,
‘before_title’ => ‘<h3 class=”widget-title”>’,
‘after_title’ => ‘</h3>’,
) );

?>
3. Add the new widget to the required location. As we learned before that the navigation menu can be managed with the header.php file.
Open the header.php file. Delete the codes as shown below since we will use a widget in the navigation menu.
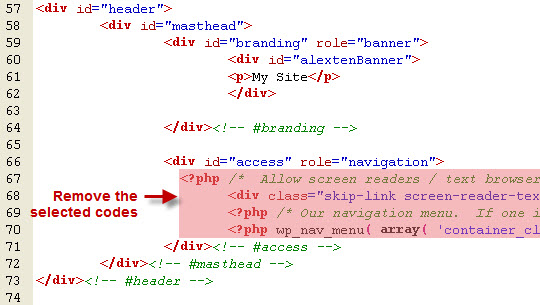
Now we need to insert the widget codes in the navigation menu. But how do we know the codes of the widget? Of course, the best way is to copy the existing widget codes to the navigation menu.
The widget codes can be found in the sidebar-footer.php of twentyten parent theme.
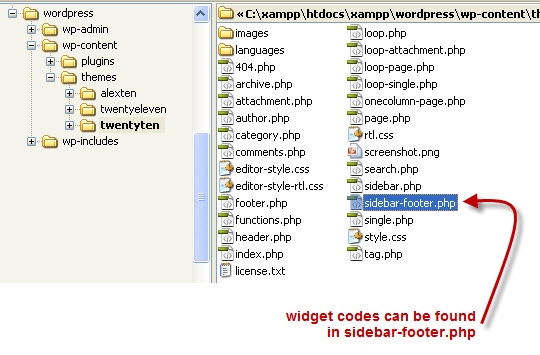
Open the sidebar-footer.php file, the widget codes of individual area can easily be identified:

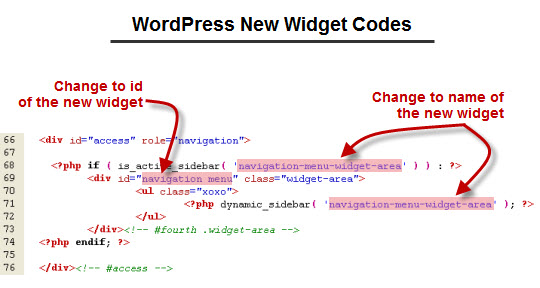
Copy the codes to the navigation menu of functions.php of alexten child theme. Remember to change the name of id of the widget as shown below:
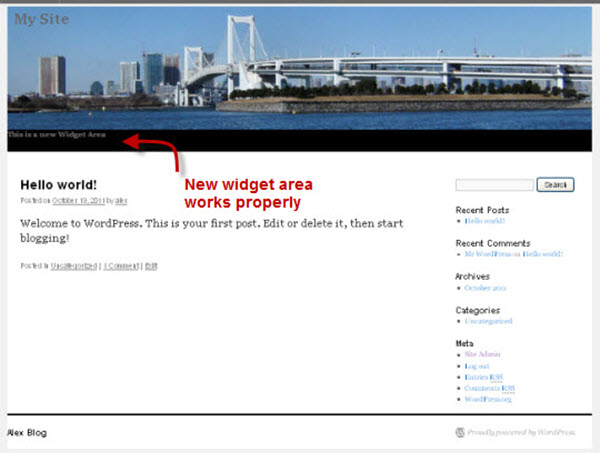
Okay! Visit the WordPress blog to see what it looks like now:
Oh! The navigation menu disappear! Why? Because the new widget area is empty by default. Let’s add a widget to the new widget area.
Log in WordPress Admin Panel, navigate to Dashboard -> Appearance -> Widgets
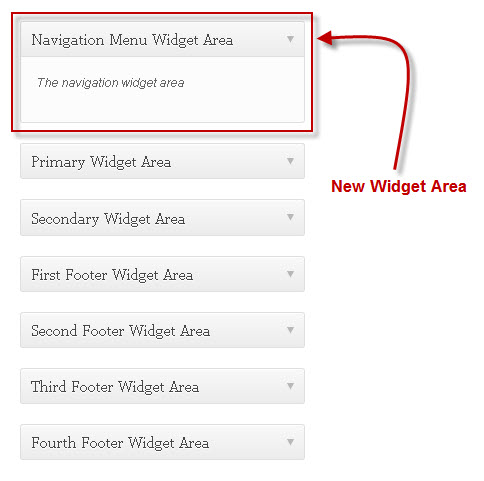
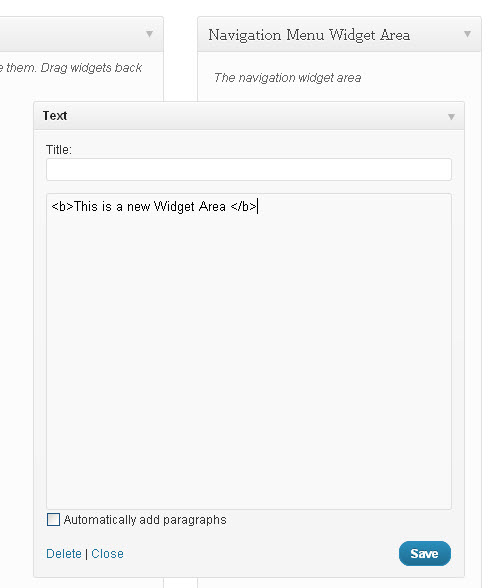
The new Navigation Menu Widget Area appear above the Primary Widget Area.
Drag a Text Widget to the empty Navigation Menu Widget Area. Write something to test if the new widget is working properly or not.
Refresh browser again to see the changes:

Yeah! The new Navigation Menu Widget Area is working properly.
Leave a Reply