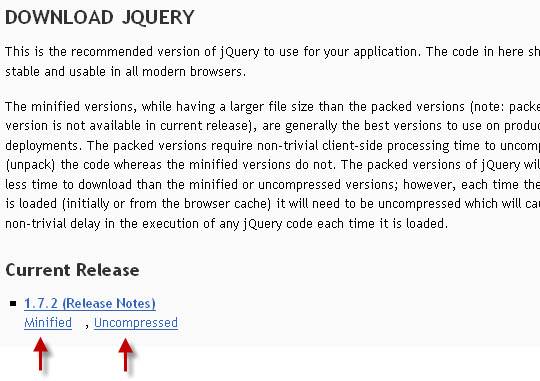
The first step is download the jQuery library from jQuery official website:
http://docs.jquery.com/Downloading_jQuery
jQuery Library Download Screen:

You have the option to download jQuery library with either Minified version or Uncompressed version. Actually both versions support the same functions. The only difference is that the Minified version is a compressed version of jquery.js (Uncompressed version), with comments and whitespaces stripped out, with shorter variable names, thus resulting a smaller file size.
Many jQuery developer suggest downloading the Uncompressed version to learn more about jQuery library during the development stage. Moreover the Uncompressed version also allow debugging much easier in development stage. Then use the Minified version for production stage for quicker processing.
I will use jquery.js for all the tutorials in this WordPress blog and website.
Save the jQuery library to your local development server or hosting server.
In order to use jQuery in your web pages or blog, you have to load the jquery.js library when the web page open. You can do that by adding the following line inside the header section of web pages:
<script type="text/javascript" src="jquery.js"></script>
The header section of the web page will look like:
<html>
<head>
     <script type="text/javascript" src="jquery.js"></script>
</head>
<body>
Make sure that the URL of jquery.js library is correct.
In the example above, the jquery.js library save in the same directory of the web page.
Of course, the jquery.js library can be saved in other directory of your development server or hosting server, for example:
<script type="text/javascript" src="https://localhost/xampp/wordpress/js/jquery.js"></script>
