Gmail is probably the best free online email account nowadays, with a lot of email storage space (10 GB), fast loading speed and user friendly interface. Users can access their Gmail accounts from any part of the world.
When Google provides the free Gmai service at the beginning, users can only create email accounts with Gmail.com domain, for example, alex@Gmail.com, peter@Gmail.com, etc… With the launch of Google Apps some years ago, users can now set up Gmail accounts with their own domains, for example, support@YourDomain.com, account@YourDomain.com, enquiry@YourDomain.com, etc…
Google Apps provide a free version and a business version. With the free version, you can create up to 10 users Gmail account under a domain for free. Actually the free version should be enough for personal and small business needs. For bigger business that require more space and more user accounts, they can get an account with “Get Google Apps for Business”.
This web hosting tutorial shows you step-by-step how to setup Gmail accounts for your own domain name.
How Google Apps for Gmail Works
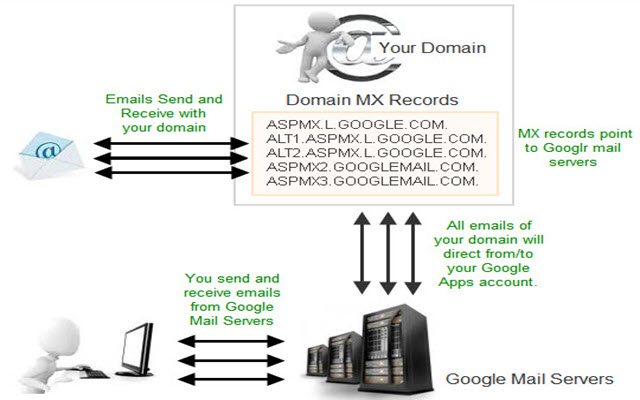
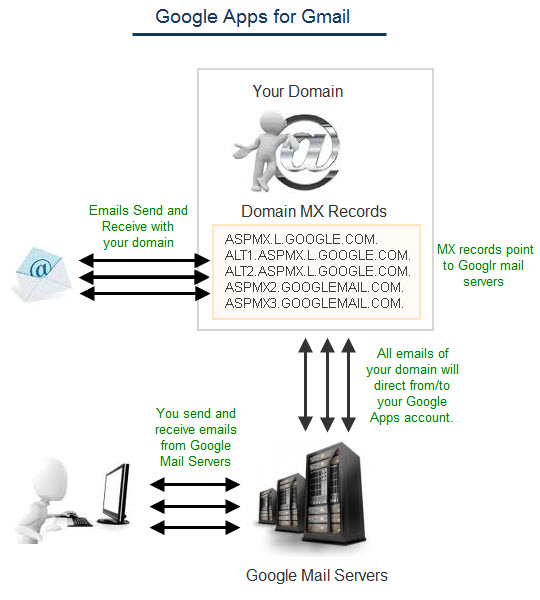
The theory is very simple, the MX records of your domain need to point to the Google mail servers. Therefore all emails send to your domain will direct to your Google Apps account, and vice versa. It can be illustrated with the diagram below:
This is quite easy to set up free Gmail accounts for your own domain. However the steps are very long and tedious. it should takes some time to set it up. Don’t worry! Just follow the steps one by one.
Let’s get started…
How to Set Up free Gmail for Your Own Domain
Of course, you should have a domain name to get started. If you do not have a domain name yet, register a new domain name from MyGreatName.com at a very cheap price, and very good support too.
To create a Google Apps account, go to “Get started with Google Apps for free” web page. The URL is:
https://www.google.com/a/cpanel/standard/new3 The following screen will appear.

Enter your domain name you wish to setup Gmail accounts. Then click on the Submit button as shown below:

After clicking on the Submit button, the Google Apps application form below will be activated:
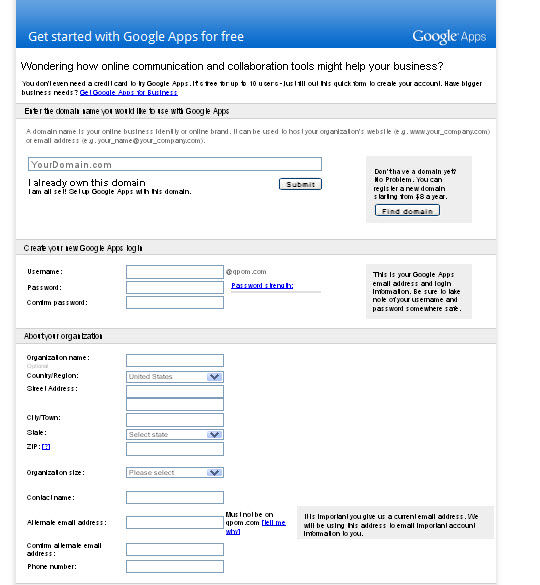
Create your new Google Apps login
Fill in the Username and password of your Google Apps account as shown below. This will be your Google Apps main email address and login information.

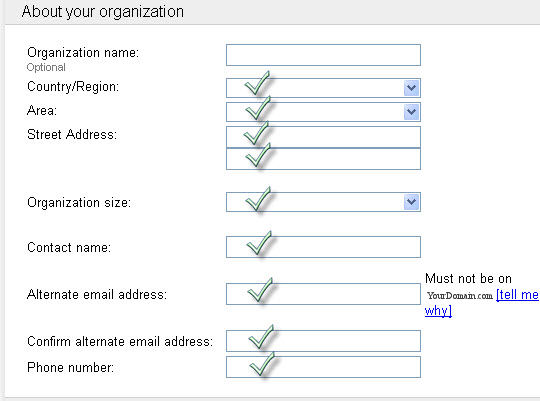
About your organization
Fill in your contact information of your Google Apps account. Be sure to use a current and valid email address. Google will use this address to send account information to you.
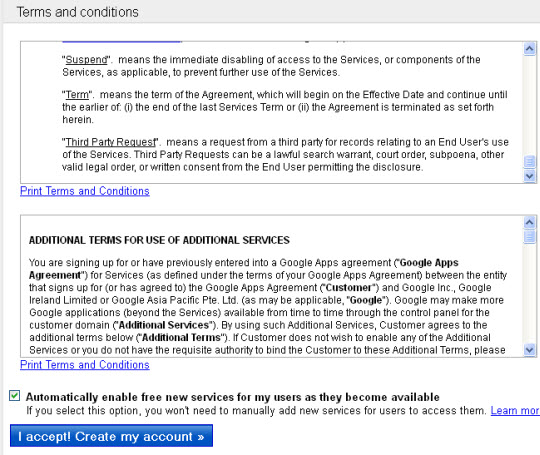
Terms and conditions
Read the terms and condition of Google Apps account carefully. Click on the “I accept! Create my account” button if you read and accept the terms and condition.
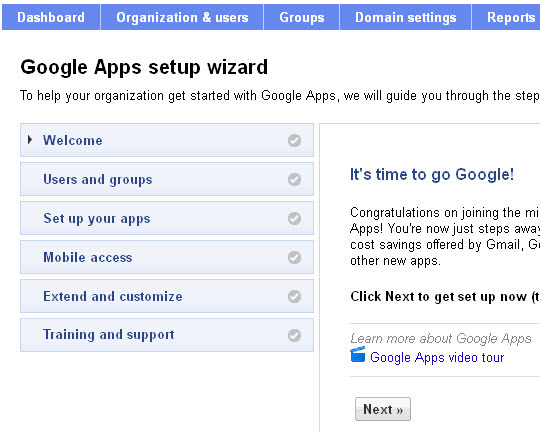
You will be direct to the Google Apps setup wizard.
Moreover you will also receive an email notification with information how to fully activate your account. Read the email carefully.
Okay! Let’s activate the account step by step.
Verify Domain Ownership
The first step is to verify that the domain is owned by you.

Choose a method that you think easier to verify the domain.
Let’s choose HTML file upload method to verify the domain. It simply download the file, and then upload the file to the home directory of your web hosting account of the domain.
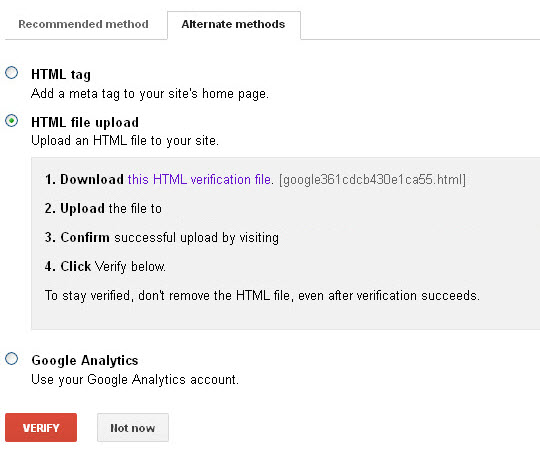
Click on the VERIFY button after you are ready. The following screen will appear if everything is okay.

Click on the Continue link. You will be redirected to the Dashboard.

You are almost done! However you still cannot use the Gmail with your domain up to this step. You still still have a lot to do in order to use your Gmail account.
Click on the Setup Tab again. The following screen appear.
Click on the Set up your apps link.
Click on Set up Gmail link as shown in the diagram below.

As we learn before at the beginning of this tutorial, you need to route your domain’s mailflow to Google Apps in order to use Gmail. In nearly all cases, you should do this via Google servers. Don’t worry this won’t affect your website.
Click on the Next button.
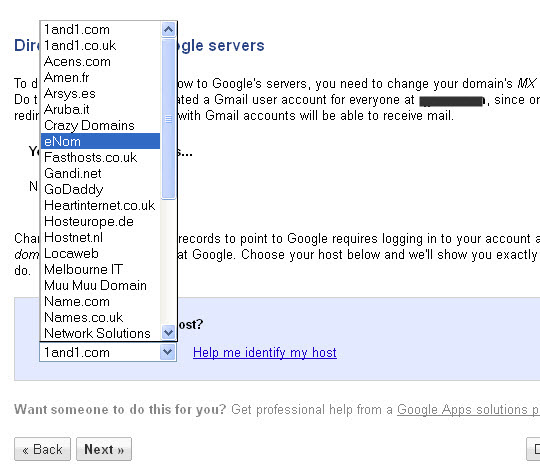
The Direct mailflow to Google servers screen appear.
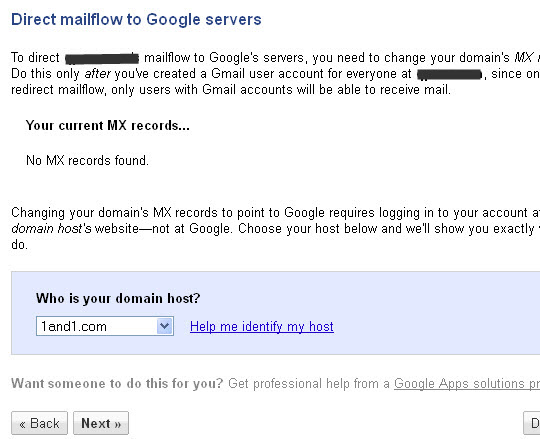
Select the domain host or domain registrar.
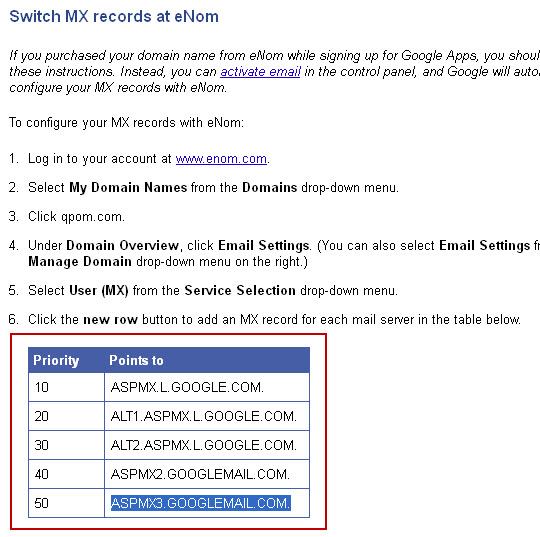
Setting MX Records
You will be given instruction how to change the MX records of your domain. In this tutorial, the following MX records need to be configured in your domain zone file.
Log in your Domain Control Panel.
Click on Email Setting.
Select MX Records.
Enter the MX records according to the instruction given by Gmail, as shown in the diagram below.
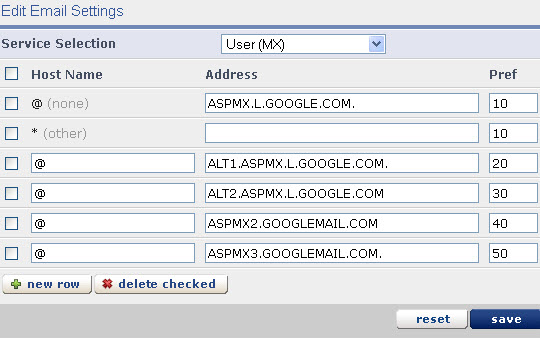
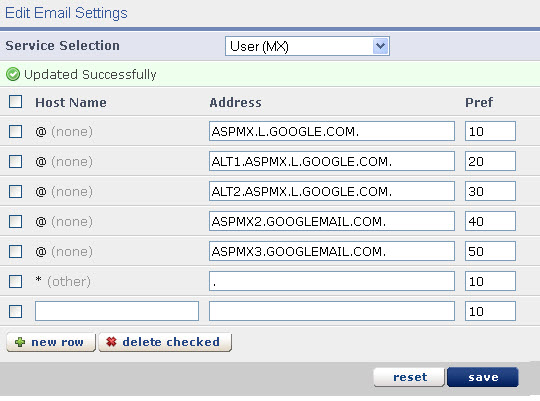
Remember to click on the Save button to save the changes of the MX records.
Go back to the Gmail Set up page.
Click on the Next button. The following screen appear.
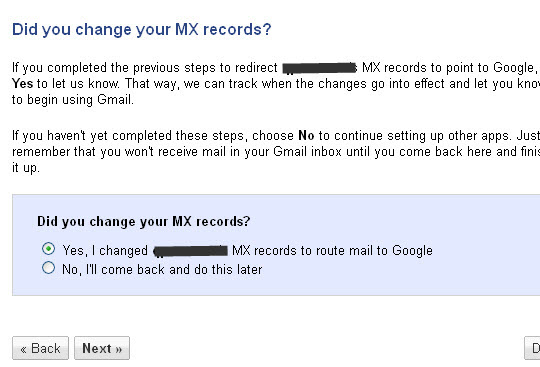
Select “Yes, I changed yourDomain.com‘s MX records to route mail to Google”. Then click on the next button to continue.
The following screen appear.

Now you need to wait for the new MX records to go into effect across the Internet. This may take up to about 48 hours for some domain registrars. However it usually takes within a few hours hours in effect for domains registered with MyGreatName.com.
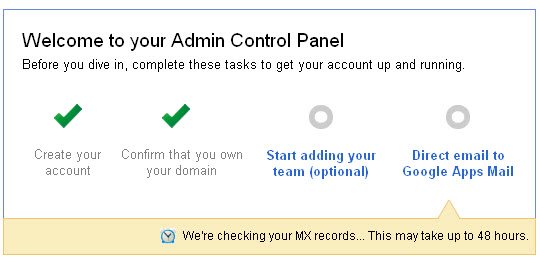
You can come back the Dashboard later to check your record status (or check Gmail status on your Dashboard tab). When your MX records are pointing to Google and you can begin using Gmail.
Check MX Records and Gmail Status
In most cases the MX records should be in effect on the Internet after a few hours if your domain is registered with MyGreatName.com. You can always come back to the Dashboard to check the status. The URL of your domain Dashboard is:
https://www.google.com/a/YourDomain.comWhen the login screen appear, enter your username and password that you provide during the sign up process before.
The Dashboard screen of your Google Apps account appear, as shown in the diagram below:
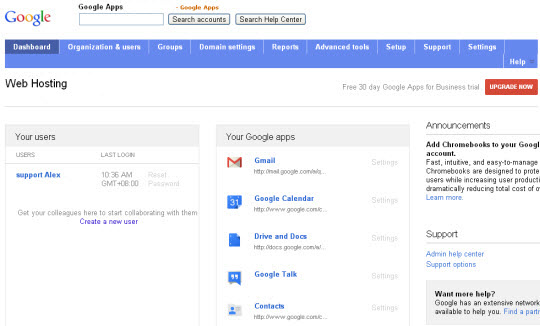
Click on the Setup tab.
If the MX records are already activated on the Internet, the following congratulations message will appear.
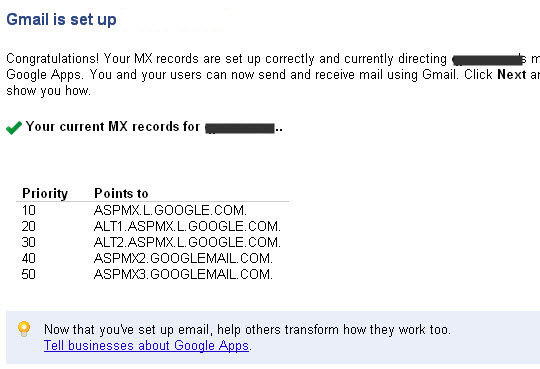
Congratulations! Your MX records are set up correctly and currently directing your domain’s email to Google Apps. You and your users can now send and receive mail using Gmail.
To create more user, simply click on the “Organization and Users” tab. Then enter the new user information.

Congratulation! You and your staff or friends can now start using Gmail of your domain to send and receive emails.
This is the end of set up Gmail for your own domain tutorial.
Leave a Reply