Most people would like to use their own domain (e.g. MyBlog.com) for the URL of their Blogger website (i.e. http://www.MyBlog.com). You can now get very cheap and affordable domains from some hosting. Let’s set up your custom domain step by step:
Step 1. Login your Domain Control Panel to Setup DNS Record.
The Domain Control Panel may looks different with different hosting or registrar. However the process is the same.
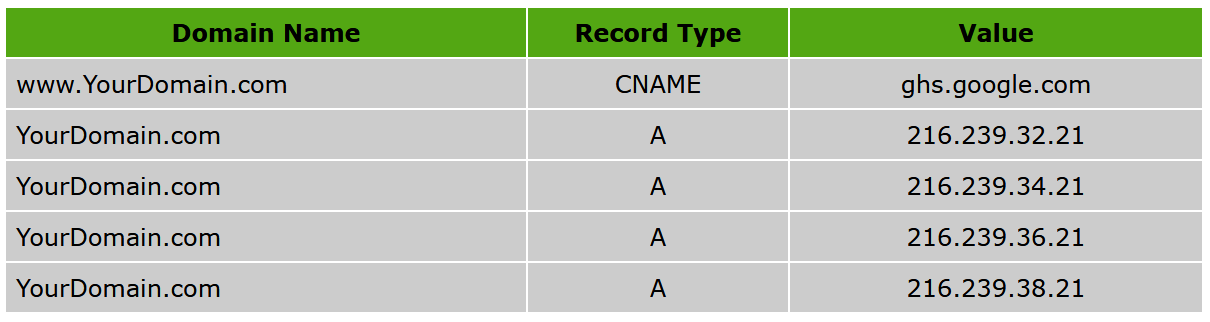
Create a ‘CNAME’ record and four ‘A’ records as shown in the following table:
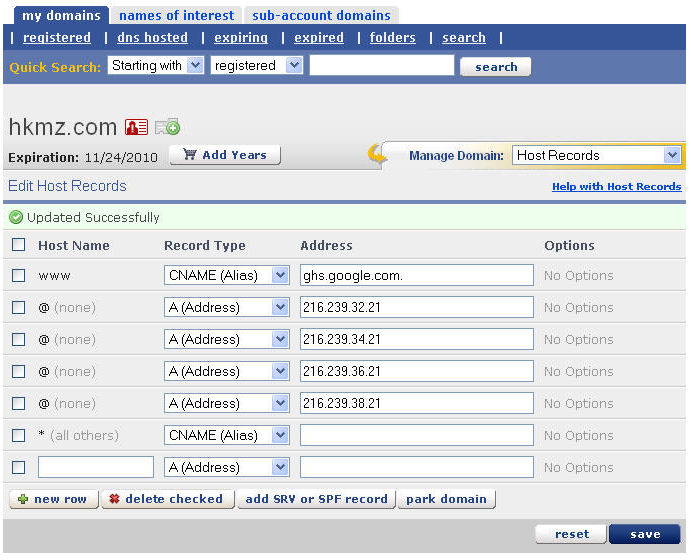
If you register domains through the above link, the Domain Control Panel will look like the picture shown below:
If you do not know how to configure the ‘CNAME’ record and ‘A’ record, there is a very good website with a lot of video tutorials. Please check the domain and hosting video tutorials here.
If you are planning to register some domains to set up some blogs, you may consider to sign up a Domain Reseller Account at an affordable price.
Now the DNS records have been set up. When your visitors enter the URL in their browsers (e.g. http://www.YourDomain.com), the browsers will go to Google server to find your blog.
Please note that the new DNS records may take up to 24 hours to take into effect. Therefore be patient.
Step 2: Update the Setting of your Blogger
As we mentioned before that the browser will go to Google servers to find your blog when visitors enter the URL. However how can the browser find your blog as there are millions of blog hosting in Google servers? Therefore we have to let the browser know which blog is linking with the domain. Let’s link the domain with your blog.
Login Your Blogger Account:
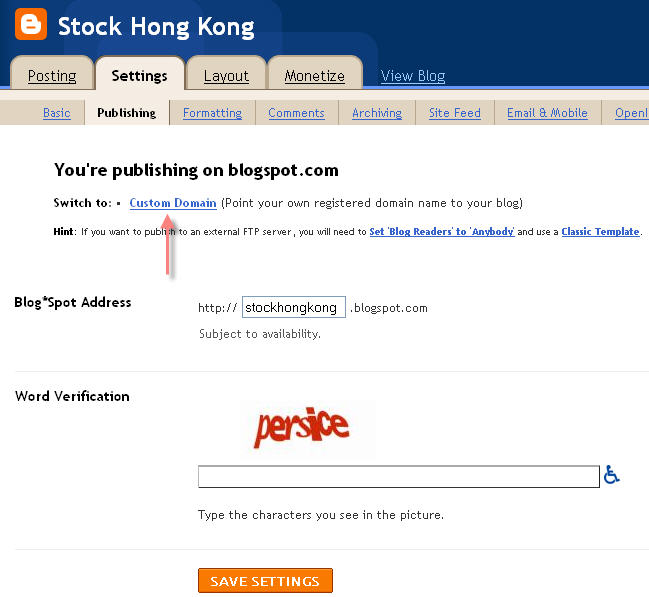
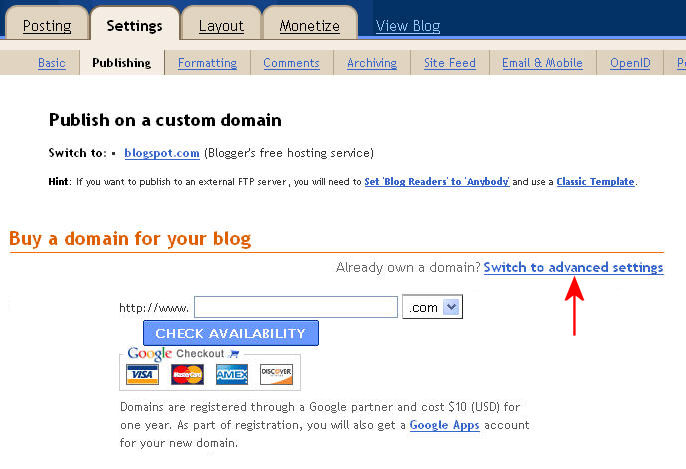
Go to Setting -> Publishing screen. Click on the Custom Domain link as shown in the picture below:
If the domain has been registered, click on the ‘Switch to advanced settings’ link as shown:
The Advanced Settings screen appear. Fill in the domain information and other information as shown below. Then click on the SAVE SETTINGS button to save the changes.

The Advanced Settings screen appear again. Check on the “Redirect” box as shown below, fill in the “Word Verification” code. Click on the SAVE SETTINGS button to save the changes.

Done! That’s all.
This Blogger tutorial shows how to set up a custom domain for your blog.
Leave a Reply