I recently doing a very interesting webpage design with jQuery. The basic idea is very simple. Actually we learned it before for many times. Therefore this is very important to know how to apply what we learned to a real design. This is always true nowadays that: A new invention is simply made up with many simple things.
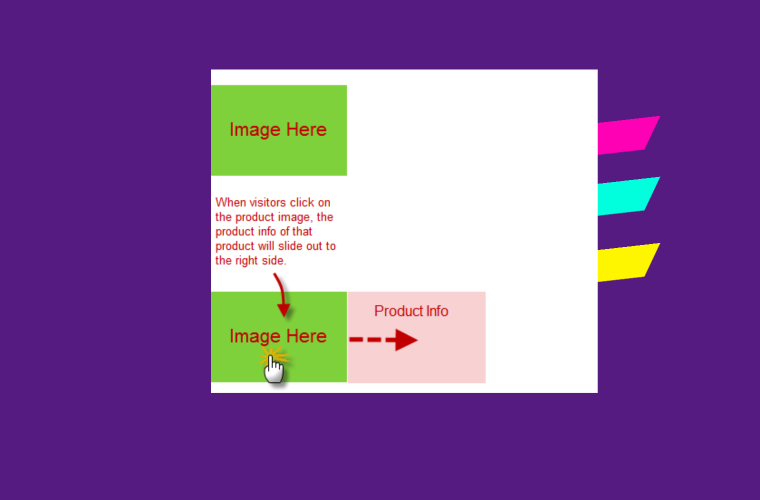
Let’s discuss what is my jQuery design. The design is that when visitors click on a product image, the product information will slide out from behind the product image.

Actually there are many methods to achieve the animation effect with jQuery. The most simple and easy way is:
- Use an outer Div layer to jail the Product Image Div and Product Info Div.
- Make the size of the outer Div same as the Product Image Div. This way the Product Image and Product Info Divs will overlap together.
- Overlapping the Div layer of Product Image and Product Info. The Product Image Div is on top of Product Info Div.
The other is setting the CSS styles of the Div layers. Then the HTML layout is finished.

As you can see the reason to do that is to force the Product Info Div layer sit below the Product Image Div layer.
Now the idea is very clear. When the width of outer Div layer is animating (increasing) to the right, thus providing enough space for the Product Info Div layer to “spring back” to it’s original position.
Here’s the jQuery codes of how it works:
<!DOCTYPE html PUBLIC "-//W3C//DTD XHTML 1.0 Transitional//EN" "http://www.w3.org/TR/xhtml1/DTD/xhtml1-transitional.dtd">
<html xmlns="http://www.w3.org/1999/xhtml">
<head>
<meta http-equiv="Content-Type" content="text/html; charset=utf-8" />
<title>Animate Div Layer to Resume Original HTML Layout</title>
<style type="text/css">
<!--
h2 {
//padding-left: 30px;
padding-bottom: 5px;
color: #039;
}

#frame {
//padding:5px;
//margin-bottom:5px;
border: 4px solid #000;
background-repeat: no-repeat;
background-position: right top;
background-image: url(sea.png);
height: 100px;
overflow: hidden;
width: 150px;
}

.left {
width:150px;
height:100px;
background-color:#FC0;
float: left;
}

.right {
width:150px;
height:100px;
background-color:#9C0;
float: right;
}
-->
</style>

<script type="text/javascript" src="jquery.js"></script>
<script type="text/javascript">
$("document").ready(function() {

var targetElement = $("#frame img");

targetElement.click(function() {

if ($("#frame").width() < 151) {
$("#frame").animate( {"width": "+=150px"}, 1000 );
//alert("The width is:" + $("#frame").width());
}
});

});
</script>

</head>
<body>

<h2>Animate Div to Resume Original HTML Layout</h2>
<p>There are two layers (left and right) overlapping together.</p>

<div id="frame">
<div class="left"><img src="test.png" width="150" height="100" />
</div>

<div class="right">
This is the right side.
</div>

</div>

</body>
</html>
Note that there is only one <img> tag inside the #frame Div layer:

What if there are more than one <img> tag inside the #frame Div Layer? I will discuss it later.
Download jQuery Source Files:
Click here to download the jQuery source file
Of course, you need to modify the codes a bit to make it more practical.
Leave a Reply