Some webmasters are always quite confused with the Return URL setting with the PayPal buy button and the Auto Return setting in the Website Payment Preferences.
Let’s see how they works .
Table of Contents
Create a PayPal Buy Button with Return URL
1. Log in PayPal account and create a new button.
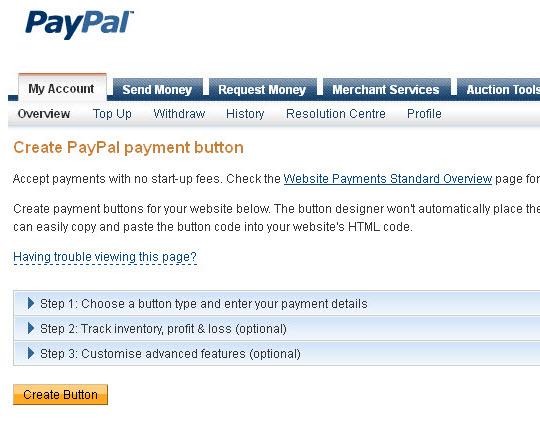
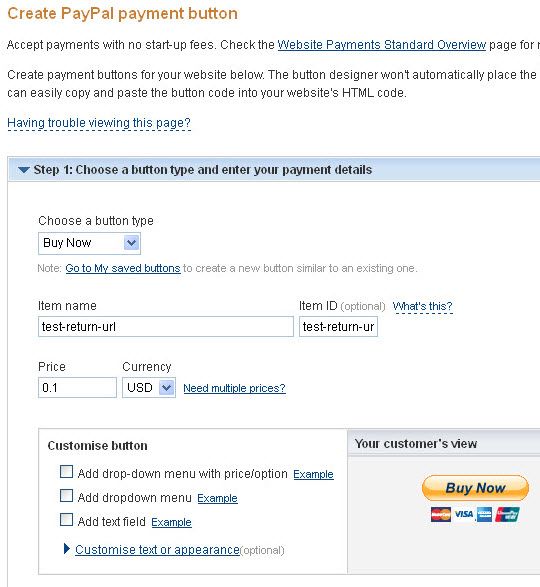
2. Click on Step 1 to enter payment details.
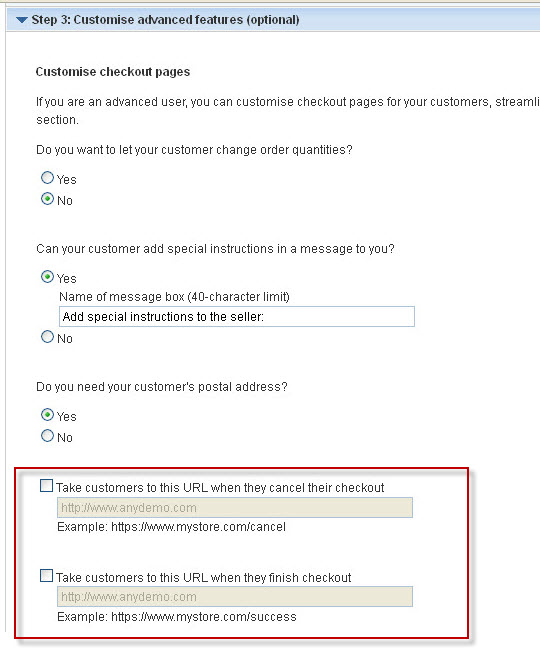
3. To set the Return URL of the PayPal buy button, click on Step 3 for advanced features customization. Check the “Take customers to this URL when they finish checkout” and enter the return URL, as shown in the diagram below:
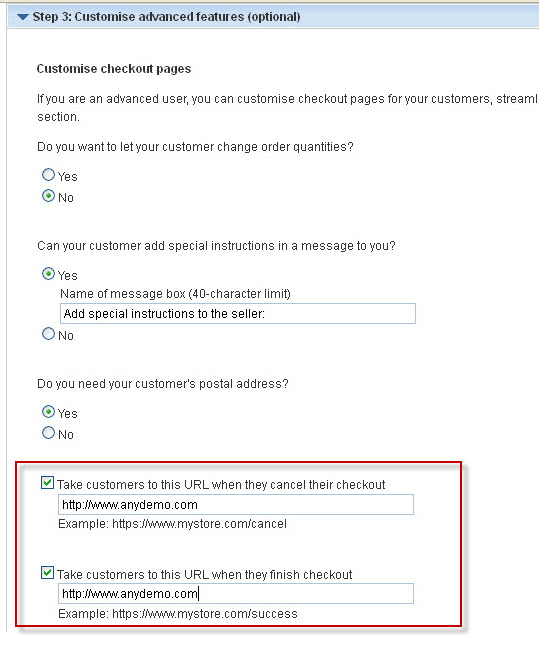
** Pay attention to the Return URL.
The PayPal buy button with return URL has been created. The next step is to create another Paypal buy button without return URL.
Create a PayPal Buy Button Without Return URL
4. Create the PayPal button as before with a different item name and item ID.
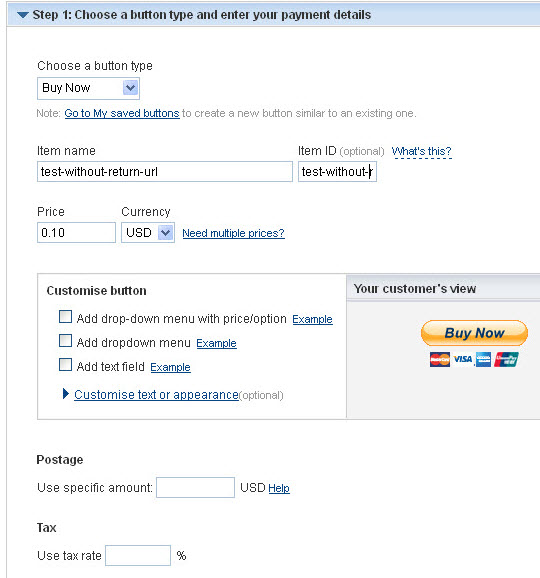
5. This time do not check the “Take customers to this URL when they finish checkout”. This will disable the return URL advanced feature of this PayPal buy button.
6. Using the generated codes to prepare a web page to test the buying process.
<h1>PayPal Buy Buttons</h1>

<table width="500" border="0" cellspacing="5" cellpadding="0">
  <tr>
    <td width="240">PayPal Button With Return URL</td>
    <td>
        <form action="https://www.paypal.com/cgi-bin/webscr" method="post">
        <input type="hidden" name="cmd" value="_s-xclick">
        <input type="hidden" name="hosted_button_id" value="A8VYL2D96TUU4">
        <input type="image" src="https://www.paypalobjects.com/en_GB/HK/i/btn/btn_buynowCC_LG_wCUP.gif" border="0" name="submit" alt="PayPal — The safer, easier way to pay online.">
        <img alt="" border="0" src="https://www.paypalobjects.com/en_GB/i/scr/pixel.gif" width="1" height="1">
        </form>
    </td>
  </tr>
  <tr>
    <td>PayPal Button Without Return URL</td>
    <td>
        <form action="https://www.paypal.com/cgi-bin/webscr" method="post">
        <input type="hidden" name="cmd" value="_s-xclick">
        <input type="hidden" name="hosted_button_id" value="4C3VFZME7LSH2">
        <input type="image" src="https://www.paypalobjects.com/en_GB/HK/i/btn/btn_buynowCC_LG_wCUP.gif" border="0" name="submit" alt="PayPal — The safer, easier way to pay online.">
        <img alt="" border="0" src="https://www.paypalobjects.com/en_GB/i/scr/pixel.gif" width="1" height="1">
        </form>

    </td>
  </tr>

</table>
The webpage should look like:
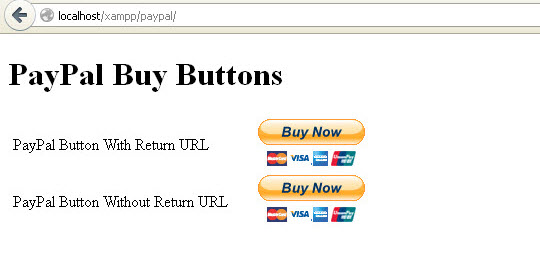
Okay! Let’s test the payment process of the two PayPal buy buttons one by one and compare the difference.
Test Payment Process of PayPal Buy Button with Return URL
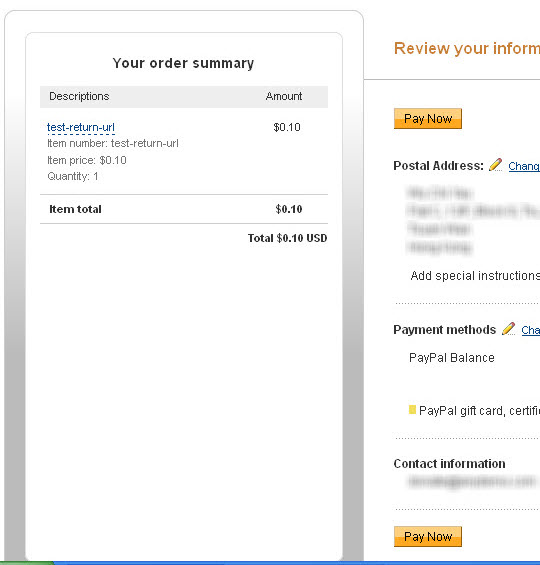
7. Click on the PayPal button with Return URL. Log in the PayPal account and click on the Pay Now button to finish the checkout.
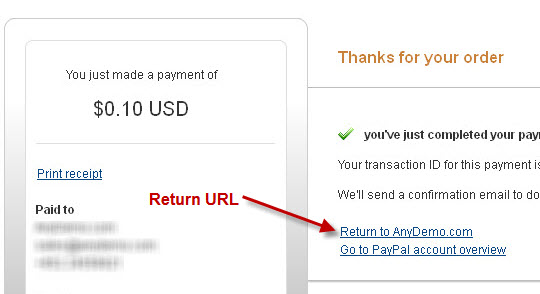
8. The Return URL appear on the screen after finished the checkout. The buyer can click on this link return to the return URL as specified in the advanced feature setting of PayPal buy button.
Test Payment Process of PayPal Buy Button Without Return URL
9. Repeat the payment process again. This time, click on the PayPal button Without Return URL. Log in the PayPal account and click on the Pay Now button to finish the checkout.
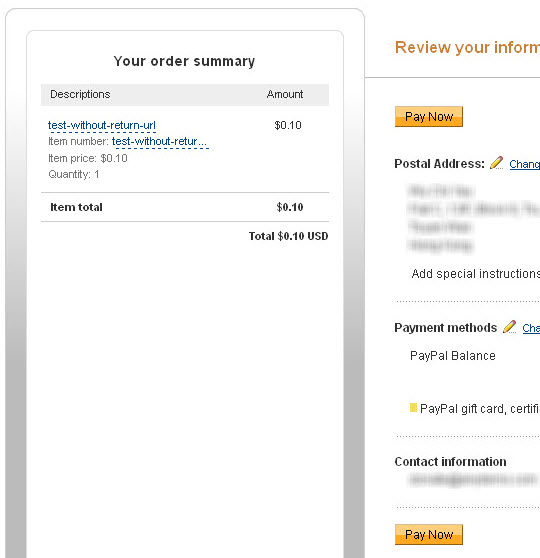
10. The Return URL appear on the screen after finished the checkout. There is no return URL. The buyer do not have the choice to click on the link return to a specified URL.
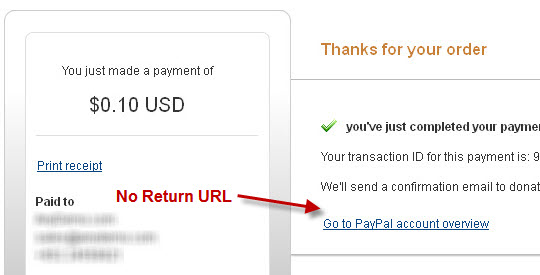
As you can see the Return URL setting within the PayPal buy button is not Auto Return. t just provide a link for the buyer to return to a specified page (usually a thank you page).
Okay! Let’s continue the testing.
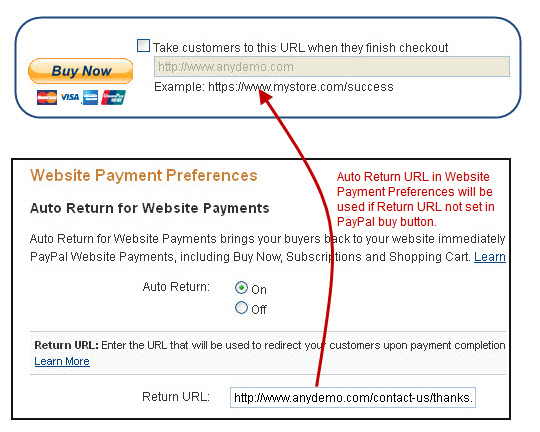
11. Go to the PayPal Website Payment Preferences setting page.
- Check on the Auto Return.
- Enter the Return URL
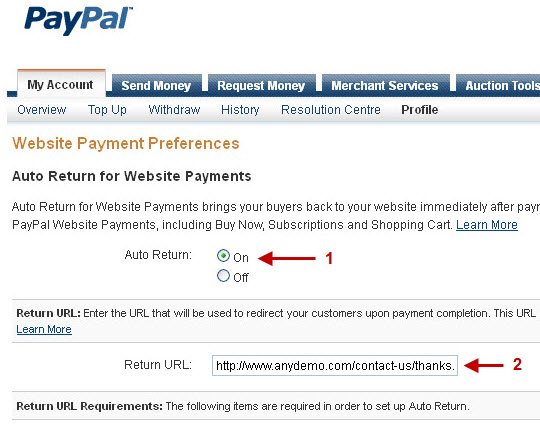
** Pay attention to the Return URL.
Let’s see what happens when the two PayPal buttons process the payment with the Auto Return is being turned on in the PayPal Website Payment Preferences.
Test PayPal Buy Button with Return URL Again
12. Repeat the payment process again. Click on the PayPal button with Return URL. Log in the PayPal account and click on the Pay Now button to finish the checkout.
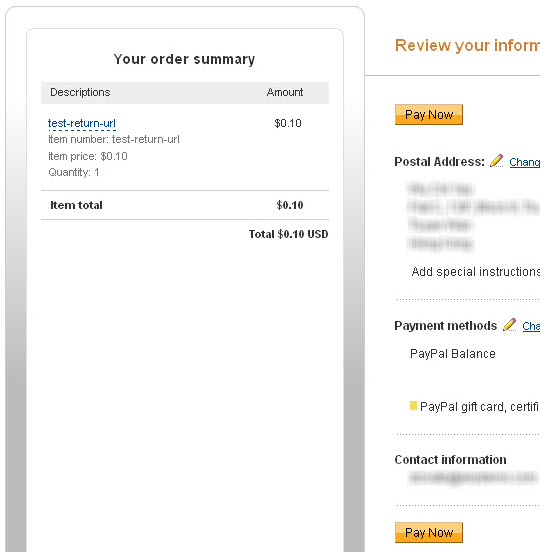
13. The screen is indicating that the buyer is going back to an URL in 10 seconds after finished the checkout.
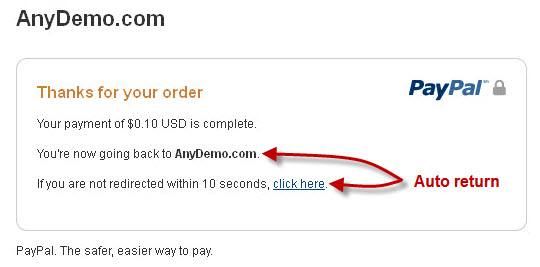
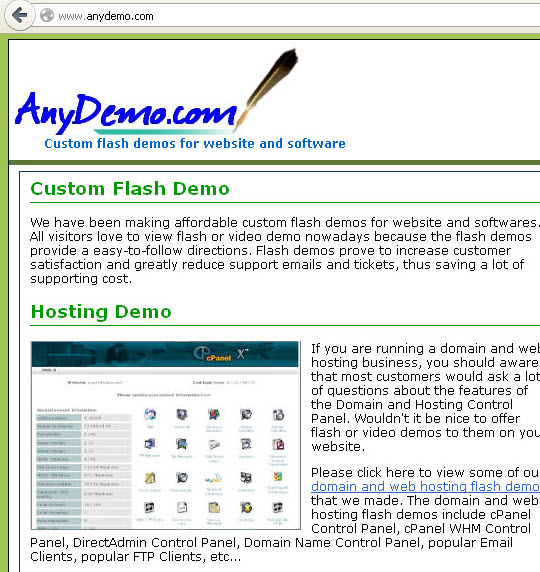
14. The buyer is then redirect to the URL that specified in the advanced setting feature of PayPal button, i.e.
http://www.anydemo.com
Note:
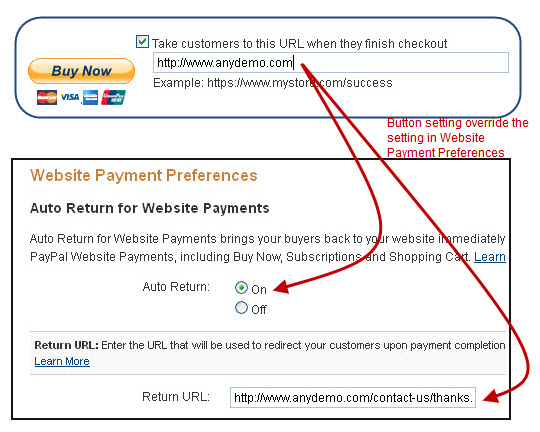
The return URL setting within the PayPal buy button will override the Auto Return setting in the Website Payment preferences. This concept is very important. This way we can create PayPal buy buttons with auto return to different URLs. Since each person can sign up only one PayPal business or premium account, this features allows us to use a single account to handle payment for multiple websites.
Test PayPal Buy Button Without Return URL Again
15. Repeat the payment process again. This time, click on the PayPal button Without Return URL. Log in the PayPal account and click on the Pay Now button to finish the checkout.
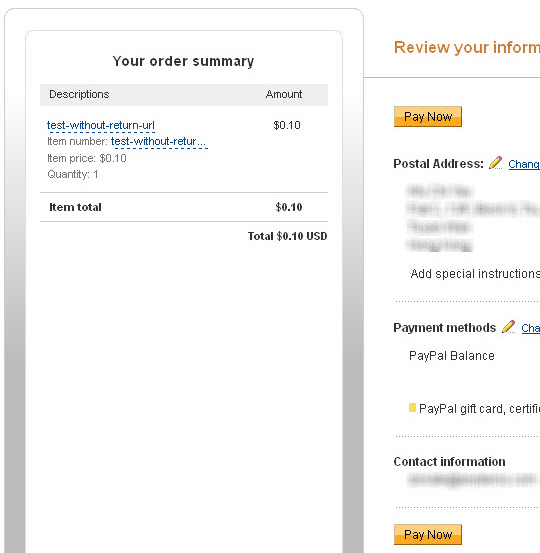
16. The screen is also indicating that the buyer is going back to an URL in 10 seconds after finished the checkout.
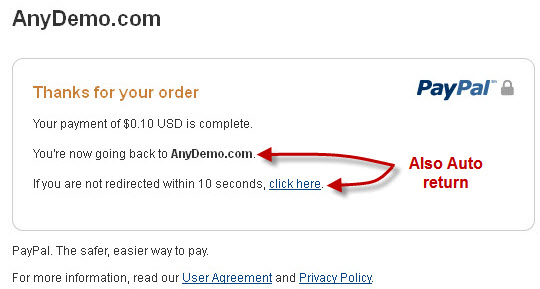
17. The buyer is then redirect to the URL that specified in the Auto Return of Website Payment Preferences, i.e.
http://www.anydemo.com/contact-us/thanks.html
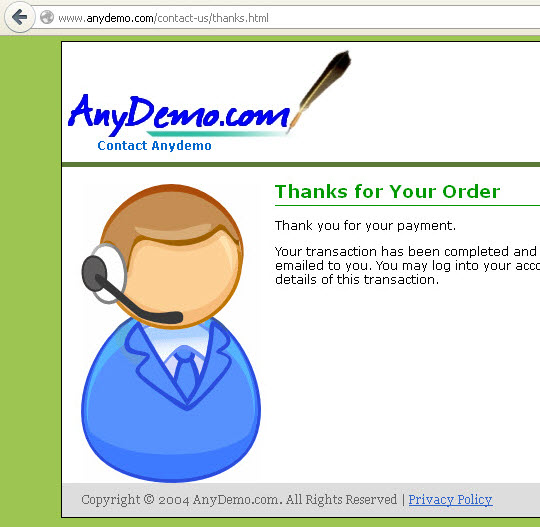
Everything should be clear now. If there is no Return URL setting in the PayPal buy button, the Auto Return URL of the Website Payment Preferences will be used.
Hopes that this article explain well the Return URL setting in the PayPal buy button and the Auto Return URL configured in the PayPal Website Payment Preferences.
Leave a Reply