
As mentioned on the documentation of WordPress : “A WordPress child theme is a theme that inherits the functionality of another theme, called the parent theme, and allows you to modify, or add to, the functionality of that parent theme.”
In other words, we can create a new theme (child theme) of our own by using the files of other themes (e.g. Twenty Ten), but without modifying the files. Now Let’s use Twenty Ten theme as the parent theme to create a new child theme.
Table of Contents
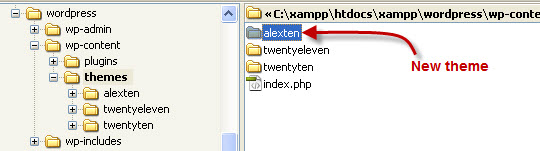
Create a Directory for WordPress New Child Theme
First of all, create a new directory with the new child theme name (alexten):
Prepare a Stylesheet for the WordPress New Child Theme
The next step is to create a stylesheet file. The only REQUIRED file in a child theme is style.css. The style.css file is required and so important because it provides the header information by which WordPress recognizes the child theme, and it replaces the style.css of the parent theme.
Here’s the header information of style.css:
/*
Theme Name: Alex Ten
Theme URI: http://wordpress.org/
Description: This is a Child theme create with TwentyTen theme.
Author: Alex
Version: 1.0
Template: twentyten
*/
Note:
For a child theme, the “Template:” line is required in order that WordPress knows the parent theme (e.g. twentyten) of that child theme (e.g. alexten).
Following the header, use the @import rule brings in the parent’s stylesheet.
/*
Theme Name: Alex Ten
Theme URI: http://wordpress.org/
Description: This is a Child theme create with TwentyTen theme.
Author: Alex
Version: 1.0
Template: twentyten
*/

@import url(“../twentyten/style.css”);
Note:
Don’t use other CSS rules above the @import rule, otherwise the parent stylesheet will not be imported.
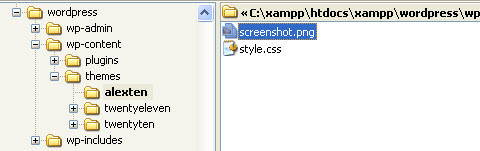
Create a Theme Thumbnail for the WordPress New Child Theme
This is good to prepare a theme thumbnail to identify the new WordPress child theme. Create the thumbnail with any paint software.
Upload the theme thumbnail to the new child theme directory as shown in the diagram below:
Log in WordPress Admin Panel and navigate to:
Dashboard -> Appearance -> Themes
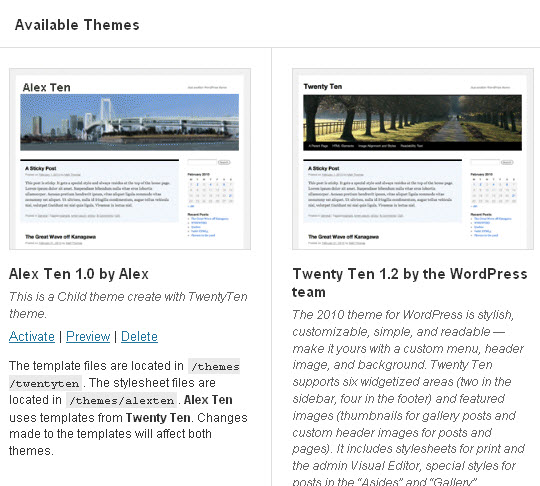
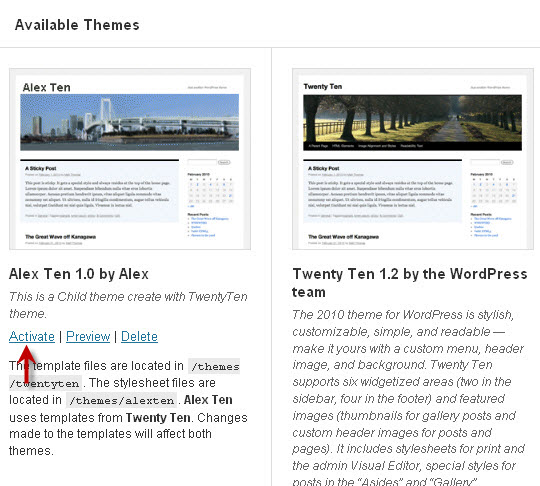
The new child theme should appear under the Available Themes menu:
Now, the new child theme is basically created. Of course it has the same theme as the parent theme at this moment. The next steps are to customize the new child theme to your own that looks different from the parent theme.
Activate New WordPress Child Theme
The new WordPress child theme (alexten) is now put under the Available Themes menu and ready to use. To customize the new WordPress child theme (alexten), we need to activate it. Activating a WordPress theme is easy, simply click on the Activate link as shown in the diagram below:
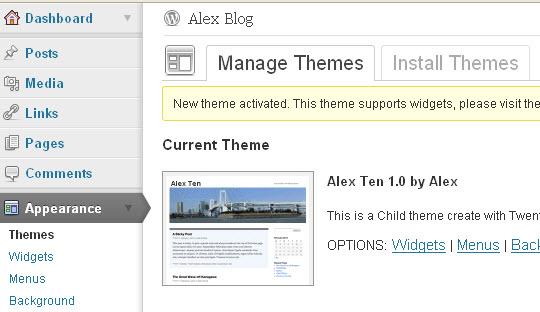
The new WordPress child theme is now showing under the Current Theme. In other words, the WordPress is now using the new alexten child theme!
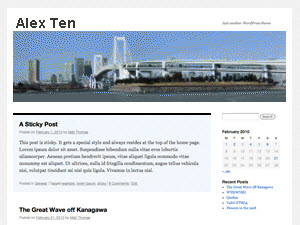
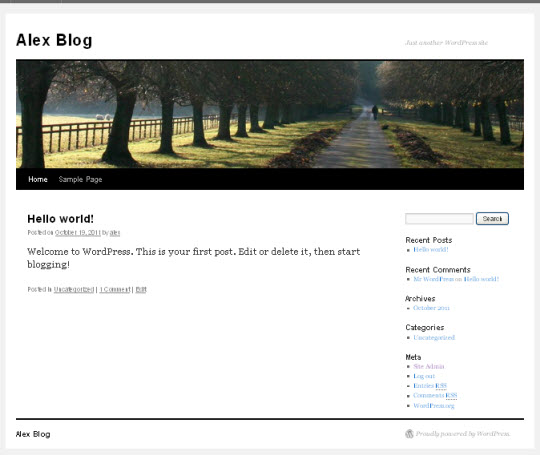
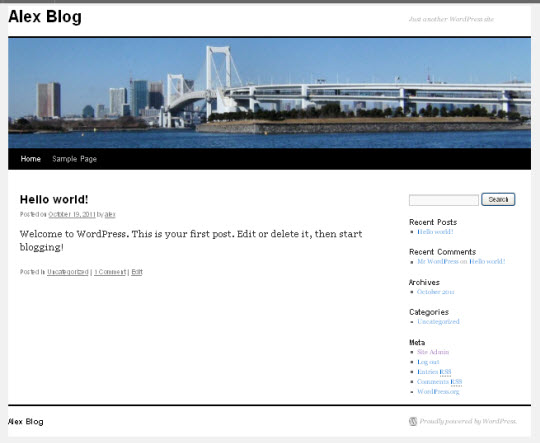
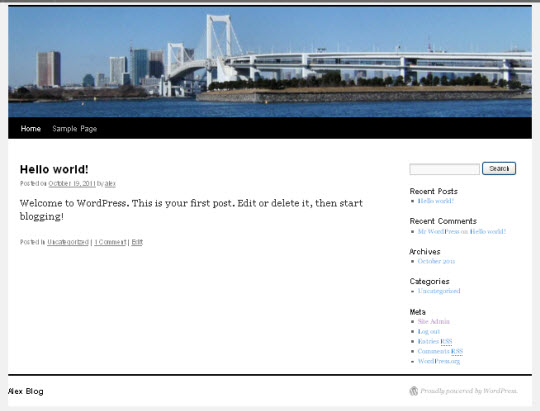
Navigate to the WordPress Blog and see if the new WordPress child theme is working properly. As expected the new WordPress child theme looks exactly the same as the default Twenty Ten parent theme.
Let’s start customizing the new WordPress child theme (alexten).
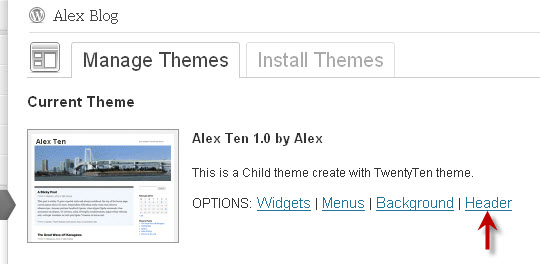
Customize Banner of new WordPress Child Theme
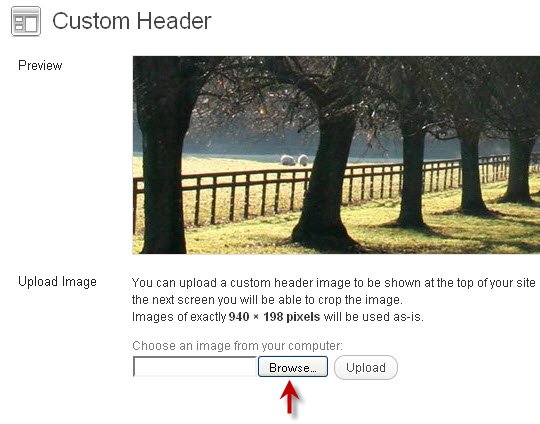
To use a new banner for the new WordPress child theme, click on the Header link as shown below:
Upload a new banner image from local computer by clicking on the browse button as shown below:
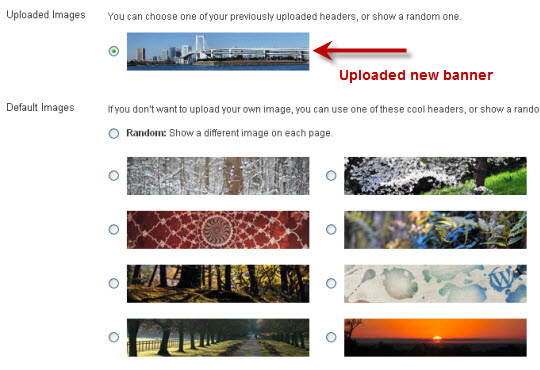
The new banner has been uploaded. Actually you can switch back to any banners anytime available on the theme.
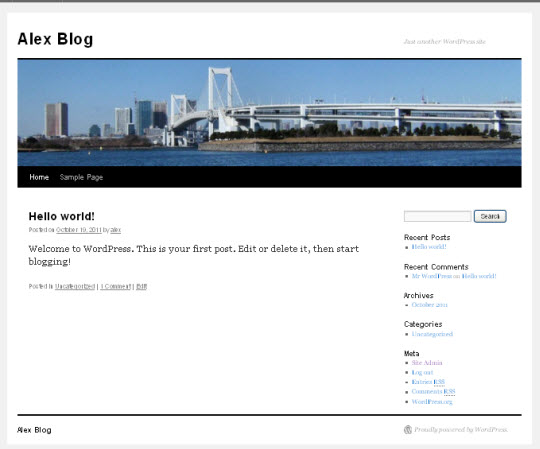
Visit the WordPress blog to see how it looks now:
So far so good. Let’s see how to customize the new WordPress theme further as we did before.
Customize New Child Theme with a New StyleSheet
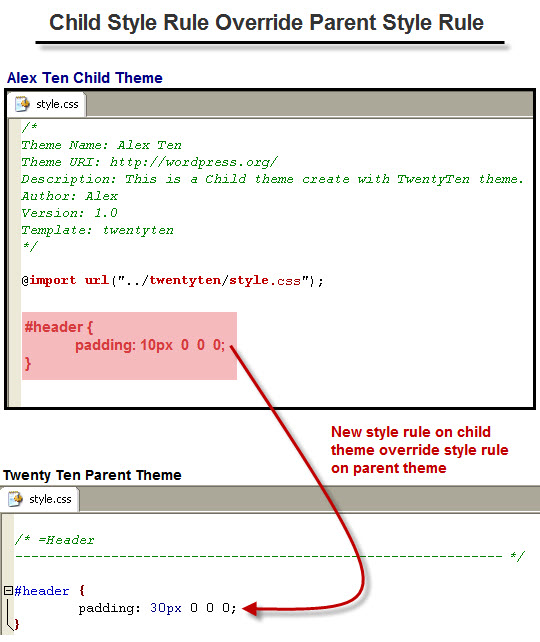
Now we are going to customize the new WordPress child theme without modifying the stylesheet of the parent theme. The basic concept is that we will write styles on the stylesheet of the child theme to override the styles of the parent theme. This can be illustrated in the diagram below:
Okay! Let’s get started!
Space Above WordPress Blog Title
We already learned and did it before. The spacing (padding) is setting in the padding-top properties of the #header selector of the parent theme.
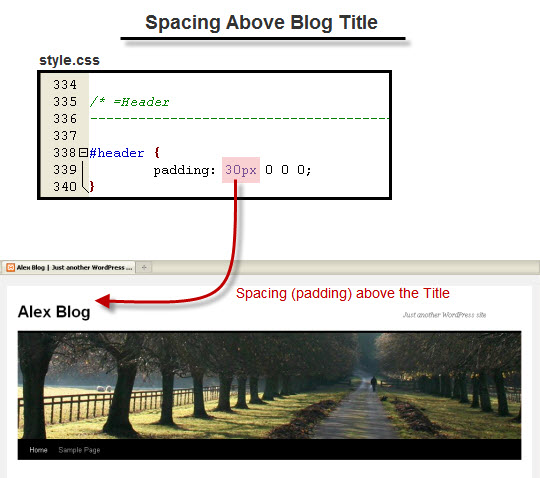
This time we will not edit the stylesheet of the WordPress parent theme. In stead we write a new style rule in the stylesheet of the new alexten child theme.
Open the styesheet of alexten child theme. Remove the space above the Blog Title by writing a new style rule by setting zero to the padding-top properties:
#header {
    padding: 0px;
}
The stylesheet of Alex ten child theme now becomes:
/*
Theme Name: Alex Ten
Theme URI: http://wordpress.org/
Description: This is a Child theme create with TwentyTen theme.
Author: Alex
Version: 1.0
Template: twentyten
*/
@import url(“../twentyten/style.css”);
/* Remove space above blog title */
#header {
padding: 0px;
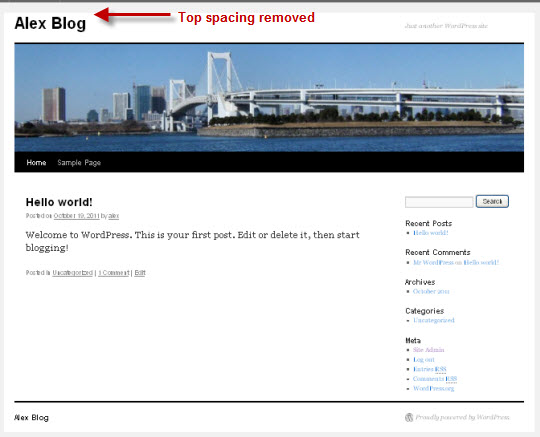
} This way the new style rule of #header’s padding of the child theme will override the style of the parent theme.
Visit the WordPress Blog again and see how it looks:
Let’s customize the new child theme a bit further that we did before.
Modify Spaces on Two Sides and Top of Header
The spaces on two sides of Header and the space on the top can easily be modified.
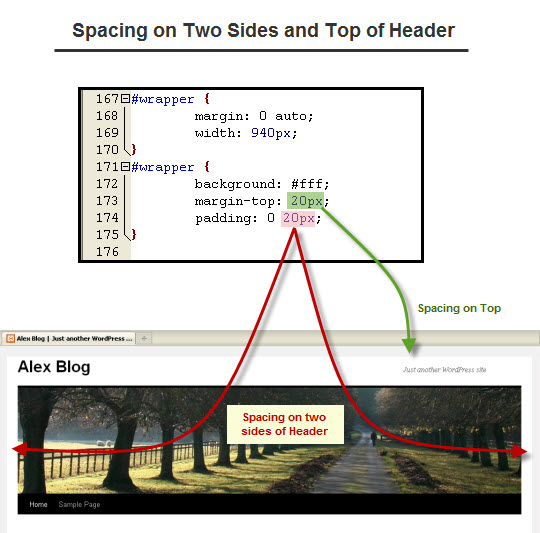
Modify Spaces on Two Sides of WordPress Header
The spacing on two sides of WordPress Header can be removed by writing a new style for the padding properties with #wrapper div tag setting to zero. This way, there will be no any padding for the #wrapper.
The stylesheet of Alex ten child theme now becomes:
/*
Theme Name: Alex Ten
Theme URI: http://wordpress.org/
Description: This is a Child theme create with TwentyTen theme.
Author: Alex
Version: 1.0
Template: twentyten
*/

@import url(“../twentyten/style.css”);

/* Remove space above blog title */
#header {
padding: 0px;
}

/* Remove spaces on two sides of header*/
#wrapper {
padding: 0px;
}
Now the new style rule of #wrapper’s padding of the child theme will override the style of the parent theme.
Visit the WordPress Blog again and see how it looks:
Modify Space on Top of WordPress Header
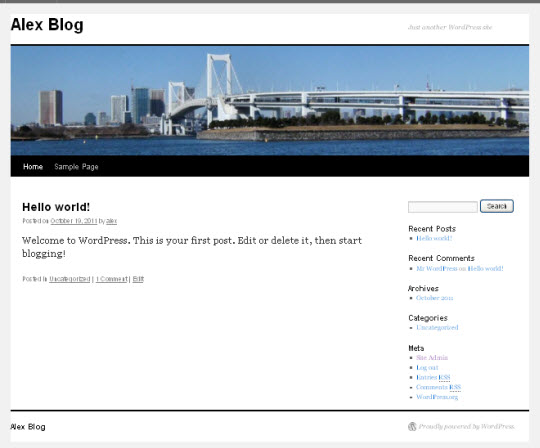
Similarly the spacing on the top of Header can be modified by writing a new style rule for the margin-top properties. How about changing the spacing on the top to 5 pixels?
The stylesheet of Alex ten child theme now becomes:
/*
Theme Name: Alex Ten
Theme URI: http://wordpress.org/
Description: This is a Child theme create with TwentyTen theme.
Author: Alex
Version: 1.0
Template: twentyten
*/

@import url(“../twentyten/style.css”);

/* Remove space above blog title */
#header {
padding: 0px;
}

#wrapper {
/* Remove spaces on two sides of header*/
padding: 0px;
/* Modify spaces on top of header*/
margin-top: 5px;
}
The WordPress blog now looks like:
By repeating the same customization we did before, the new WordPress child theme can be further customized to a new look completely different from the parent theme. Hm… It seems that this is not too difficult to create a new WordPress child theme.
WordPress Child Theme Header Section Customization
Up to now, the customization of the new WordPress child theme is only limited to modifying the stylesheet. What if we also wish to modify the layout of the child theme, for example, delete the blog title, delete the navigation menu, or move the navigation menu to other location, etc… Let’s see how to do it…
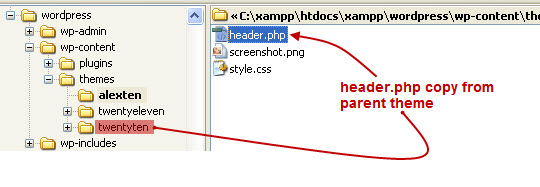
In order to modify the layout of WordPress child theme, a header.php file is also required in the directory of child theme folder, i.e. alexten. The most easiest way and quickest way is copy the header.php from parent theme (twentyten) to the child theme.
Open the header.php file of WordPress child theme. Now we can customize the header layout by modifying the header.php as before.
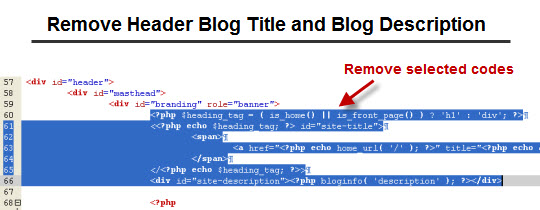
Remove the Header Blog Title and Description
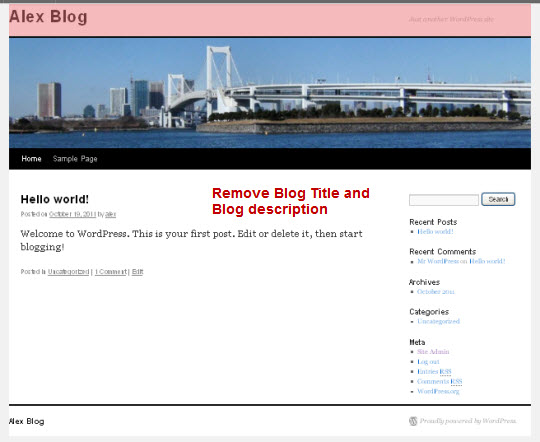
We already studied the file structure of the header.php before, the blog title and blog description section can easily be removed by removing the codes as shown below:
Here’s how the WordPress child theme look likes:
In order to provide more space for the contents, this is a good idea to use a background image for the banner. This way, the blog title can be on top of the banner. Let’s go…
Upload the banner image to the child theme directory, for example:
home/wp-content/themes/alexten/images/headers

Remove all codes inside the #branding div layer and replace with the codes as shown in the diagram below:
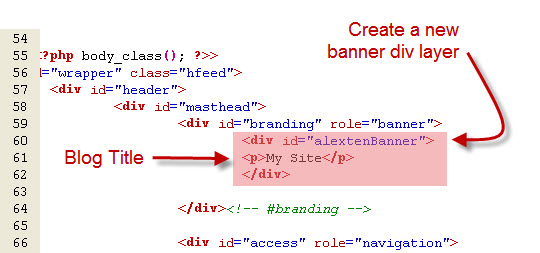
The codes simply use a new div layer (alextenBanner) with the banner as background image. Therefore the blog title can float above the banner.
The next step is to open the child theme stylesheet and write codes for the alextenBanner div layer and the blog title.
/* new div layer for banner background banner */
#alextenBanner {
    width: 940px;
    height: 198px;
    background-image:url(‘images/headers/alexten-banner.jpg’);
}

/* styles for Blog title */
#alextenBanner p {
font-size: 24px;
font-weight: bold;
padding-top: 10px;
padding-left: 10px;
}
The stylesheet of the alexten child theme now becomes:
/*
Theme Name: Alex Ten
Theme URI: http://wordpress.org/
Description: This is a Child theme create with TwentyTen theme.
Author: Alex
Version: 1.0
Template: twentyten
*/
@import url(“../twentyten/style.css”);
/* Remove space above blog title */
#header {
padding: 0px;
}
#wrapper {
/* Remove spaces on two sides of header*/
padding: 0px;
/* Modify spaces on top of header*/
margin-top: 5px;
}
/* new div layer for banner background banner */
#alextenBanner {
width: 940px;
height: 198px;
background-image:url(‘images/headers/alexten-banner.jpg’);
}
/* styles for Blog title */
#alextenBanner p {
font-size: 24px;
font-weight: bold;
padding-top: 10px;
padding-left: 10px;
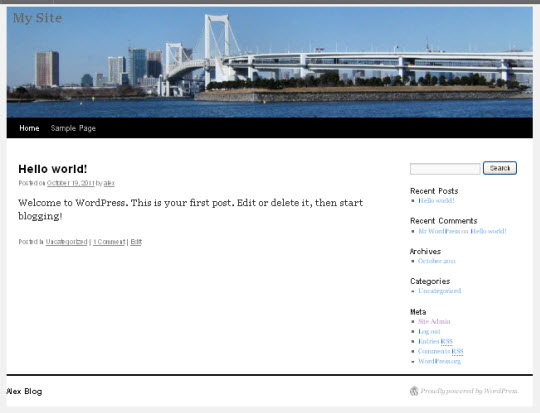
} Refresh the browser and see how the WordPress look likes now:
By using the same techniques, an interesting WordPress themes can be created.
Leave a Reply